How to Automate Google Workspace Using UiPath StudioX
Share at:

Introduction
UiPath StudioX enables business users to automate routine tasks that involve Google Workspace applications, which includes Google Drive, Google Docs, and Google Sheets.
In this article, you will learn how to install a dedicated set of activities for Google Workspace automation in UiPath StudioX as well as how to use these activities to create an automation workflow for Google Drive, one of the Google workspace applications.
Pre-requisites:
UiPath StudioX community version 2021.4 release.
Personal/work Gmail Account.
Overview of the steps to take
To automate any Google Workspace application, first you need to create a blank project and then perform the following steps in sequence.
Install the GSuite Package to use the activities that help you interact with Google Workspace applications.
Add application resource activity (Use Google Drive / Use Google Document / Use Google Spreadsheet) based on the application you want to automate.
In the above resource activity, Select/Add your Google account.
Within the scope of resource activity, start adding further activities based on the sequence of steps performed on a particular Google Workspace application.
Now that you are familiar with the generic steps to automate any Google Workspace application, let’s create an automation workflow in UiPath StudioX to automate the below-mentioned steps.
Create a new folder in Google Drive
Upload a file from local path to Google Drive folder (created in the step above).
Automation Steps
Create a new project first, and then proceed with the steps below.
STEP 1: Install GSuite Package in UiPath StudioX.(UiPath.GSuite.Activities)
Go to Manage Packages from the StudioX ribbon, select All Packages, and then search for the latest version of the UiPath GSuite Activities package. Choose the Package, Click Install and Save.
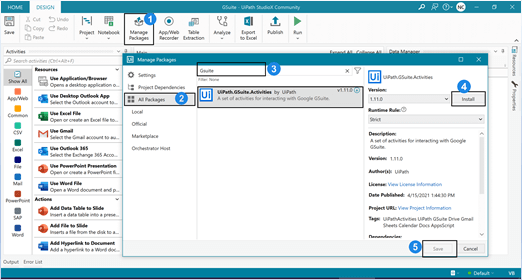
After you install the package, G Docs, G Drive, and G Sheets sections will be available in the Activities panel.
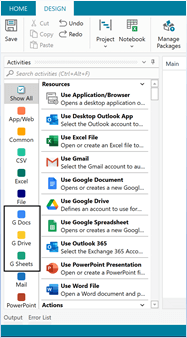
If you are using UiPath StudioX 2021.10 release, you will see an activities panel such as:
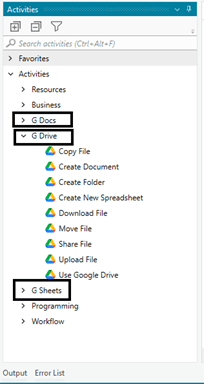
STEP 2: Add Use Google Drive activity to your automation workflow
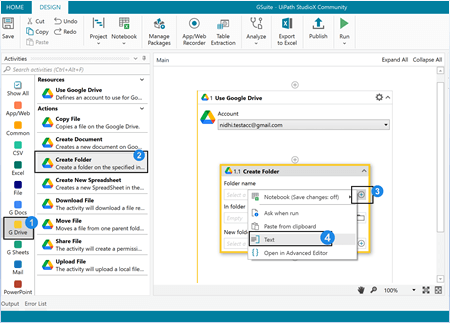
In activities Panel, go to G-Drive section, select ‘Use Google Drive’ activity, and drag it to your automation workflow.
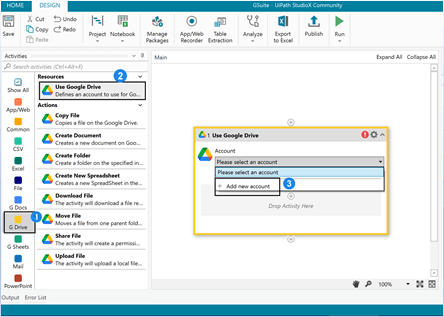
STEP 3: Add your Google account to Use Google Drive activity
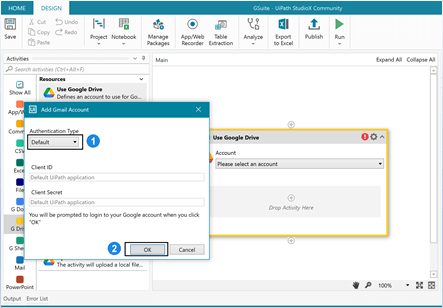
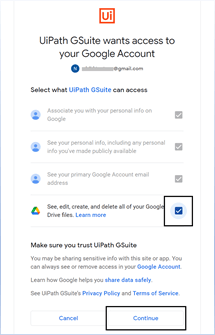
In Use ‘Google Drive activity’, click on account drop-down and choose ‘add new account’ option. Click on ‘add new account’, an ‘Add Gmail account’ pop-up window will appear, keep authentication type as Default and press OK. Next, sign in with your Google credentials to connect with Google Drive.
Step 4: Add create folder activity
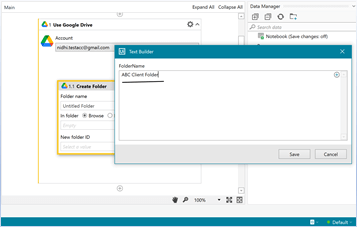
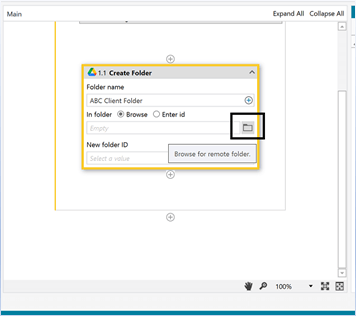
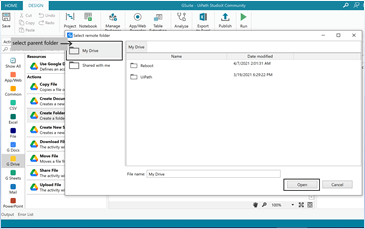
After successfully connecting with Google Drive application. Inside the Use Google Drive activity, add create folder activity and configure the fields, enter the folder name and select folder using the built-in Google Drive file browser directly from StudioX.
STEP 5: Add upload file activity
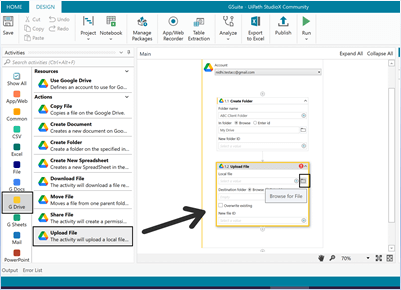
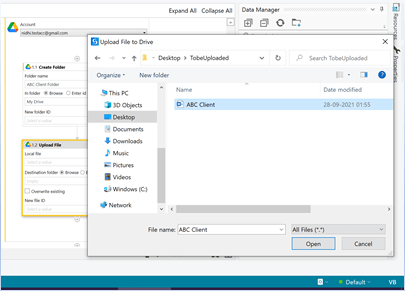
After the create folder activity, add upload file activity and configure the fields:
Local file: path of local file that needs to be uploaded to G Drive.
Destination folder: G drive folder name where local file to be uploaded.
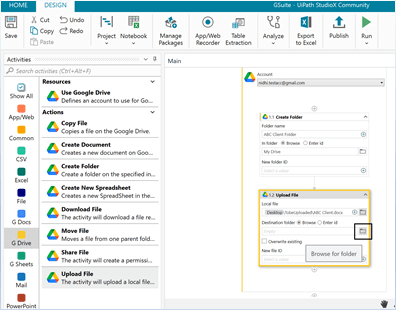
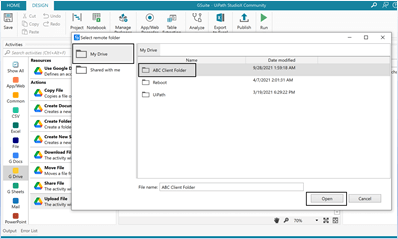
Press RUN button.
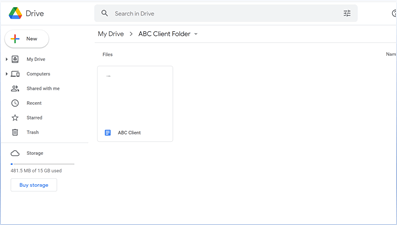
Voila! We have successfully automated Google Drive application using UiPath StudioX. Now you will be able to automate your routine tasks that involve any of Google's Workspace applications.
Are you eager to share your automation experience with StudioX in UiPath? Feel free to reach out to the community team.
Additional resources
If you aim to keep yourself updated with the top-notch RPA latest releases, I recommend you to regularly visit the UiPath Forum.
Are you curios to learn more about StudioX? Check out my YouTube Channel!
Solution Expert, RPA, Wärtsilä
Get articles from automation experts in your inbox
SubscribeGet articles from automation experts in your inbox
Sign up today and we'll email you the newest articles every week.
Thank you for subscribing!
Thank you for subscribing! Each week, we'll send the best automation blog posts straight to your inbox.


