How To Automate 'Drag And Drop'
Often enough in your routine, you need to drag and drop elements from one place on the screen to another. UiPath can of course do that for you through the means of an easy automation
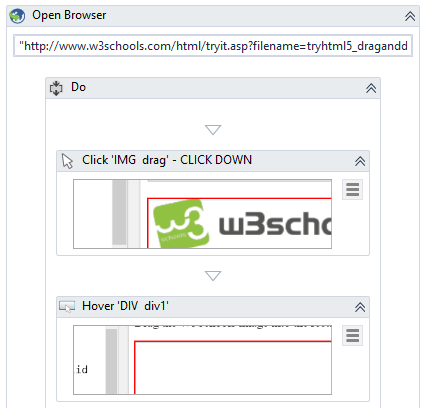
Here is an example of how to create a robot that will drag and drop a photo for you from a panel inside a webpage (the w3schools logo from the right side of https://www.w3schools.com/html/tryit.asp?filename=tryhtml5_draganddrop ) to another panel.
1. In the Activities Panel, search for the activity Open Browser and drag and drop it to the Workflow panel
2. In the edit box of this activity, insert "https://www.w3schools.com/html/tryit.asp?filename=tryhtml5_draganddrop" (the webpage on which we are performing the activity)
3. In the Activities Panel, search for the Click Activity
4. Drag and Drop it into the Do sequence inside the previous Open Browser activity
5. Indicate what element you want the automation to click and eventually drag and drop. In our case the W3Schools logo. You can use UI Explorer or even easier, the Indicate on Screen button and click on the logo in the webpage:

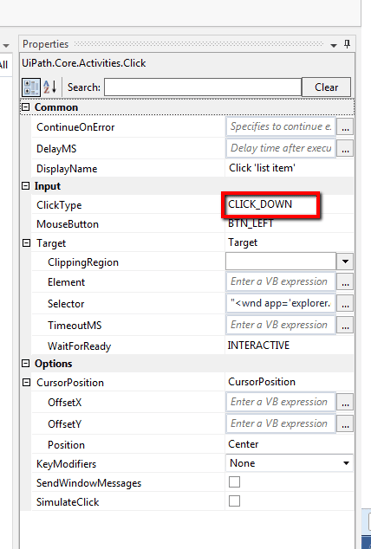
6. The key part is to select CLICK_DOWN as value for the ClickType property, so that the icon stays selected while we "move" the mouse to drag it in the target area; just like when you keep the left mouse button pressed while you drag.

6. In the Activities Panel, search for the Hover activity and drop it after the Click activity. This will simulate the mouse moving over the area where we want to drop the element.

7. Indicate the area where you want the automation to hover the mouse in order to drop our previously selected element. You can use UI Explorer, or even easier, the Indicate on Screen button as shown at point number 5.
8. In the Activities Panel, search for the Click activity.
9. Drag and Drop it in the Workflow, in the Do section of the Open Browser, after the previous Click Activity.
10. Indicate the area you want the automation to release the mouse click in order to drop our previously selected element. You can use UI Explorer, or even easier, the Indicate on Screen button as shown at point number 5.
11. Remember to select the value CLICK_UP from the ClickType property in the properties panel, so that the mouse activity performed is actually a release of the clicked button.
Attached File:
Feel free to download and use this workflow or create your own.
