AI-Based Document Data Extraction

Introduction
Document processing has always been complicated because of the way documents are designed. The documents we process have their structure and the way data is represented can be hard to tackle. However, UiPath Document Understanding has enabled many users to easily automate documents.
Out of the many features that Document Understanding provides, Forms AI plays a significant role in automatically identifying the content of the documents through its AI capabilities. Forms AI can easily automate structured documents like forms without spending a lot of time on template creation.
Requirements
Before getting started, you'll need the following:
Basic understanding of UiPath Document Understanding.
Basic understanding of UiPath Studio/ UiPath Studio Web.
Building the scenario
For us to explore this feature, let's build a simple scenario. Imagine that we are asked to analyze data from SEC Form four documents. Let's look at the following screenshot. The following screenshot is a sample Form four document. The document's structure mostly remains the same except for the rows in the tables. Let's see how Forms AI helps us quickly create a template for this.

form4-sample
Today, Forms AI comes in as a part of the cloud offering under the Document Understanding services. Once you sign in to the cloud platform, you can see the Document Understanding services section on your navigation panel on the left side.
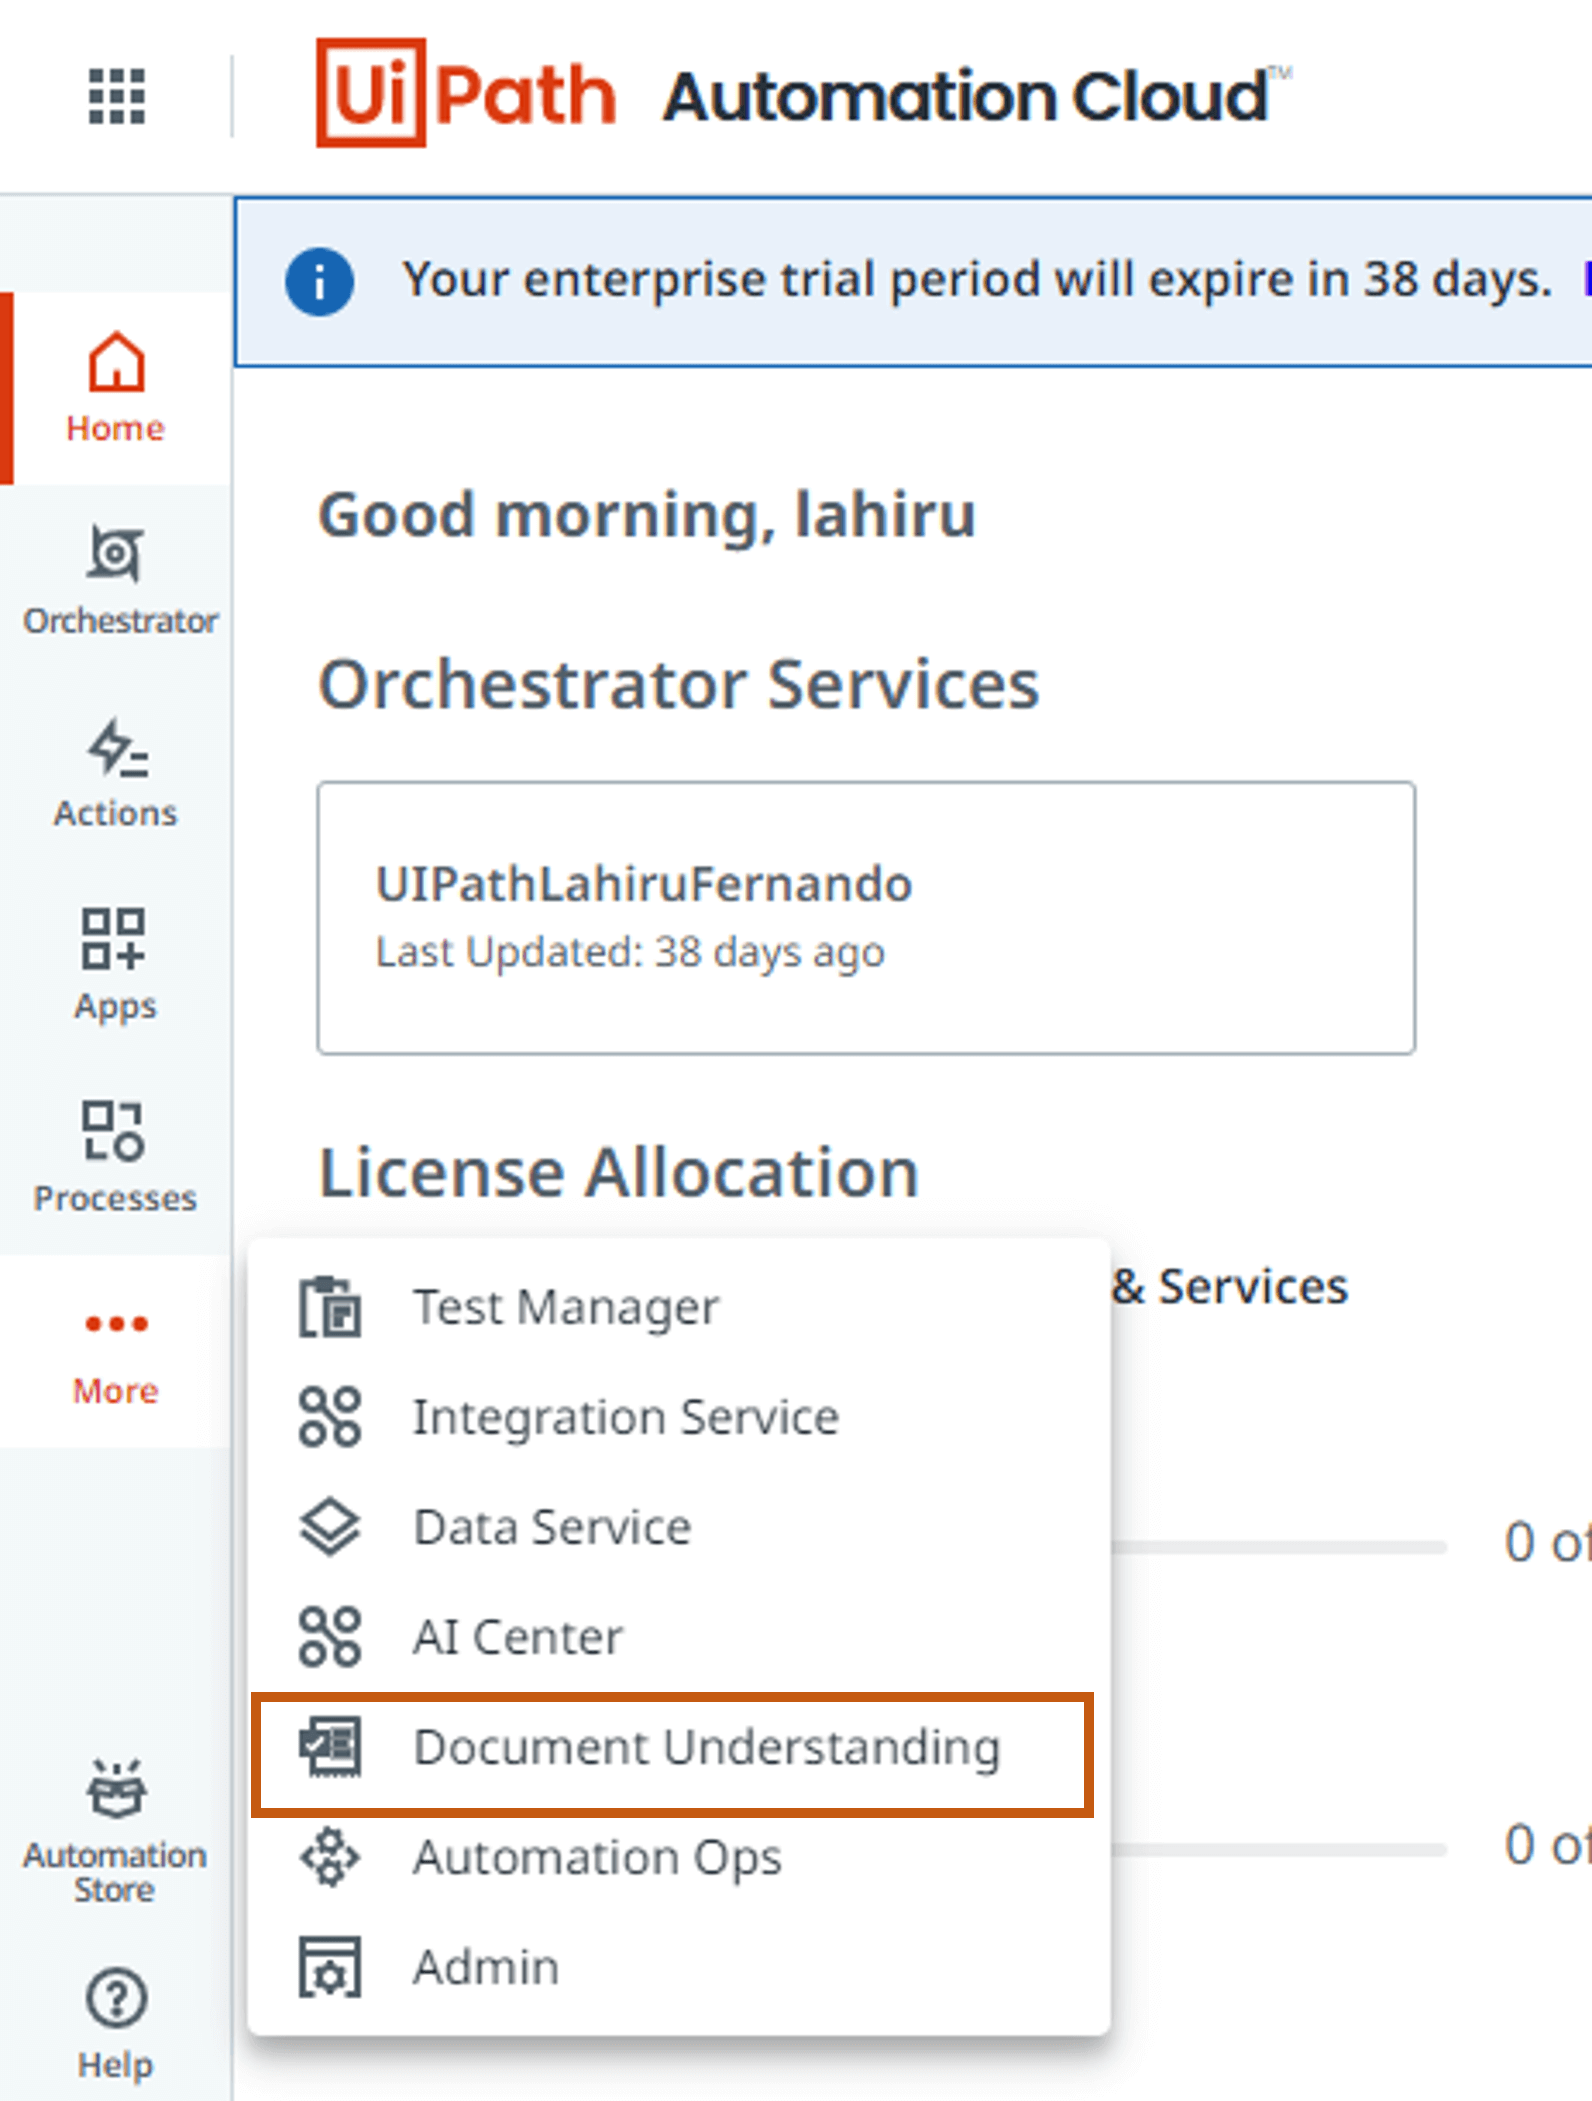
If you don't have this option available, you can enable it in the Admin panel under Tenant settings.
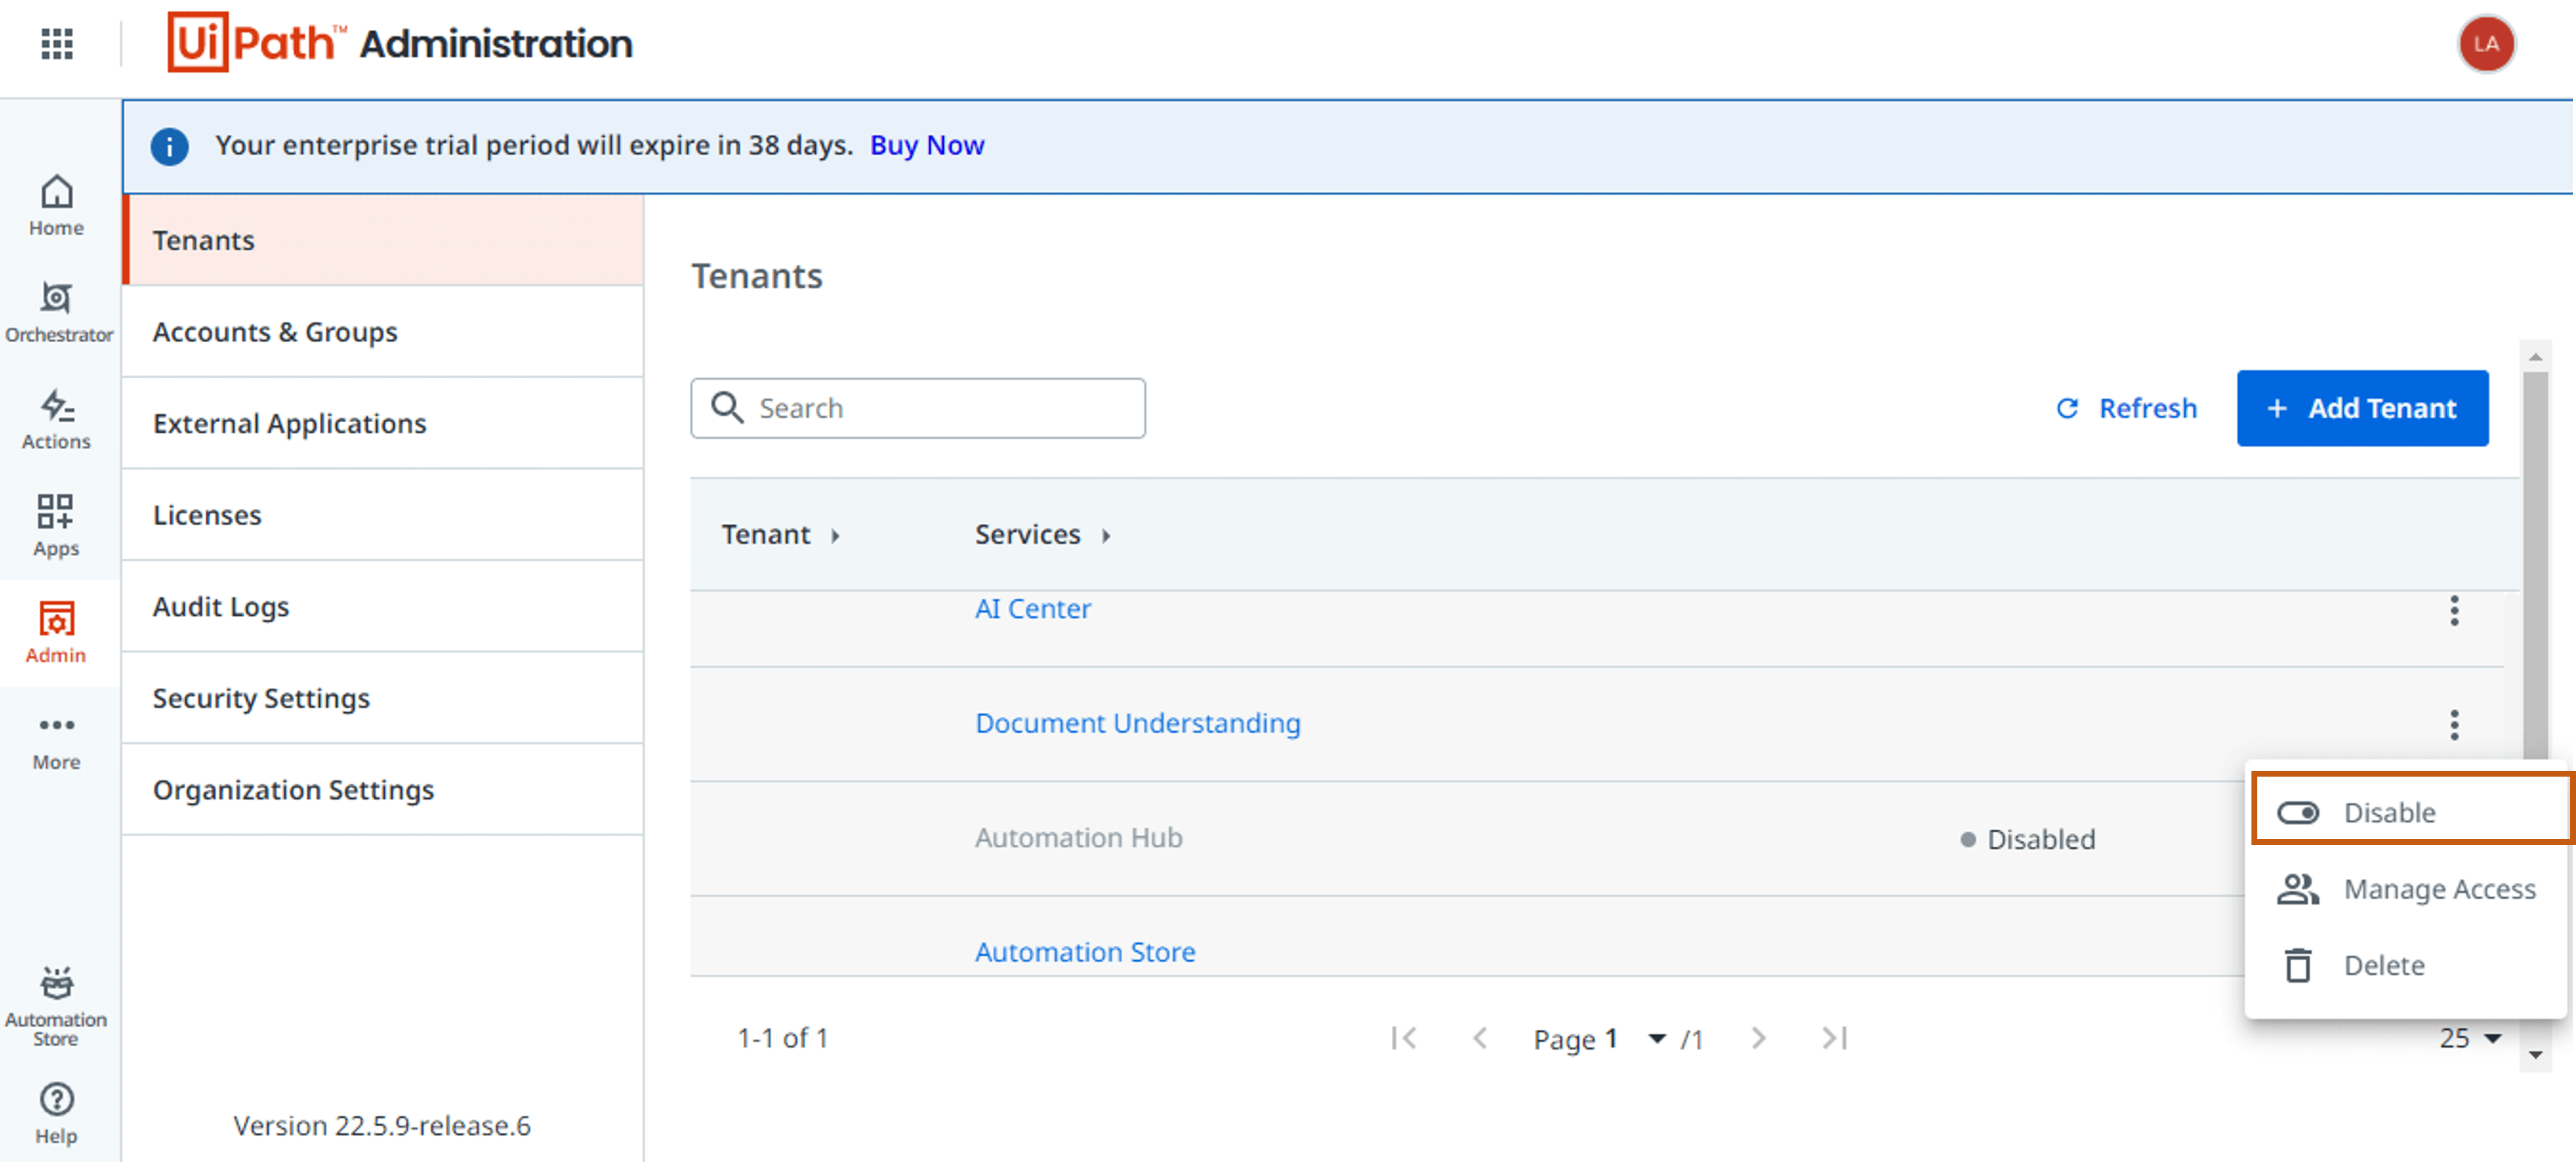
Step 1: Configuring Document Understanding project
As the first step, let's open Document Undertanding and start creating our first project. Once you are in, you'll see a screen similar to the following screenshot.
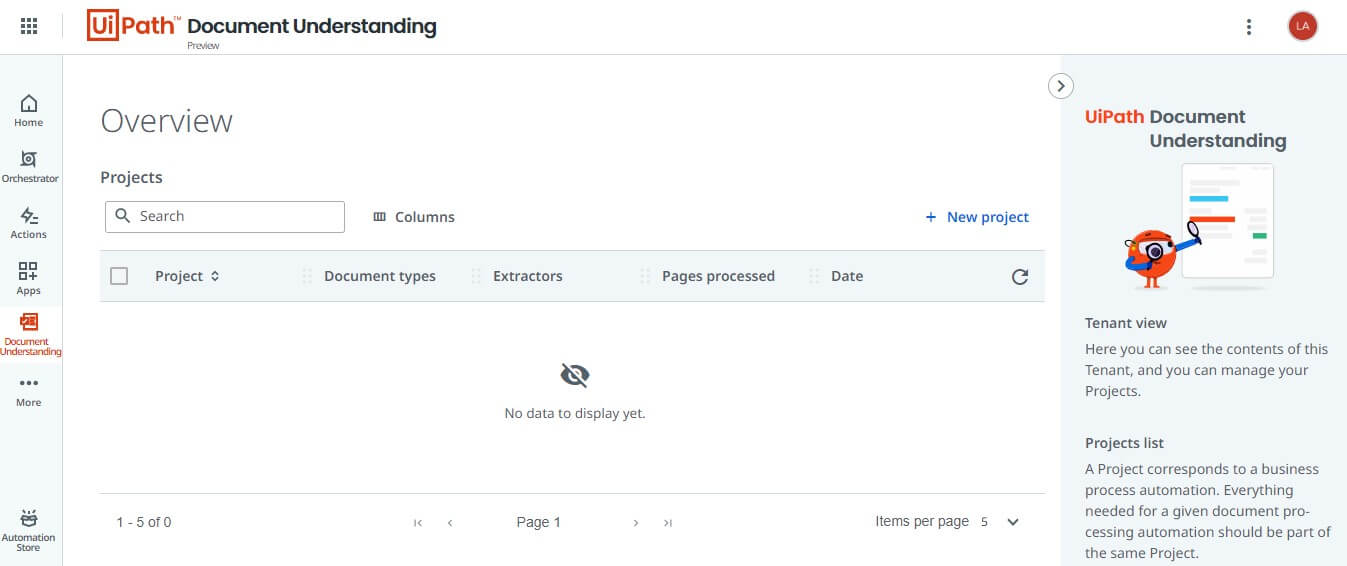
Step 1.1: Creating Document Understanding project
First, we need to create a project. The projects we create here help us group the models we build according to our business requirements. Click on the New Project button and provide a name for your project to create one.
In the project creation screen, you'll see other configuration options for optical character recognition (OCR). We can keep those options as is if we are using the UiPath Document OCR. Otherwise, you may need to change those properties to use a different OCR engine.
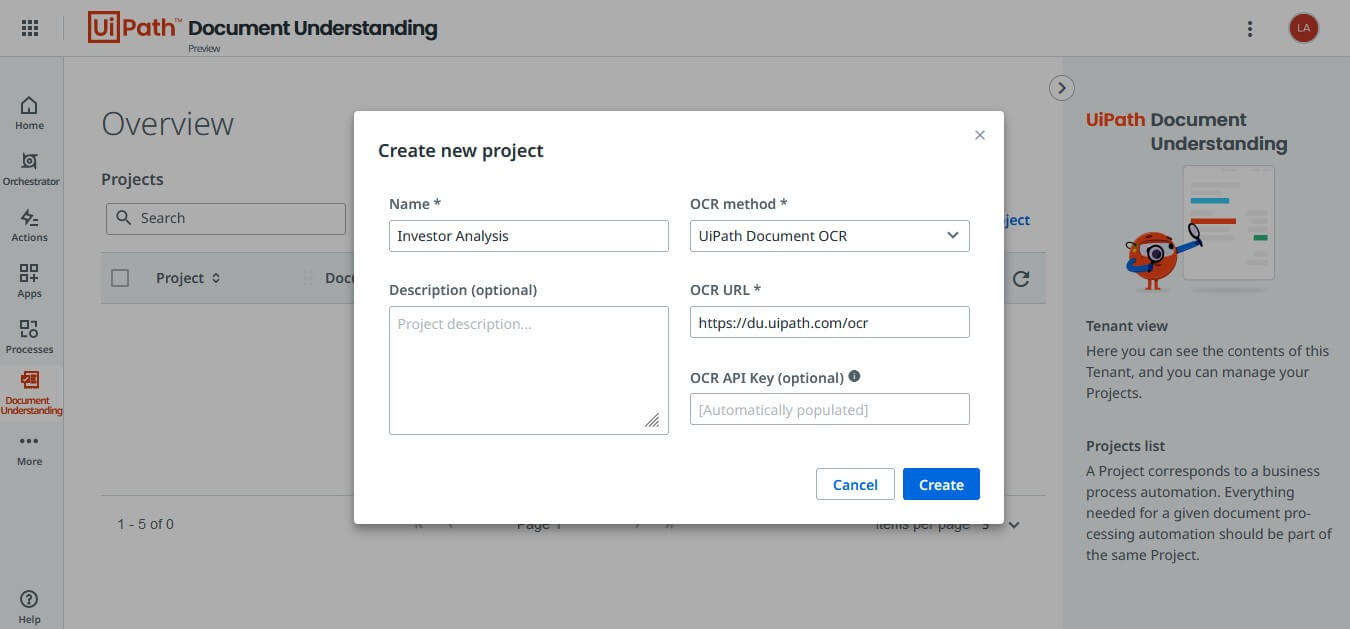
Once the project is created, it'll be shown under the Overview section. Navigate into the project by clicking on the project name to configure other options.
Step 1.2: Creating forms
Click on the New button to create a new document type to use Forms AI. Provide a name for the document type and click on the Save button to set up the document type.
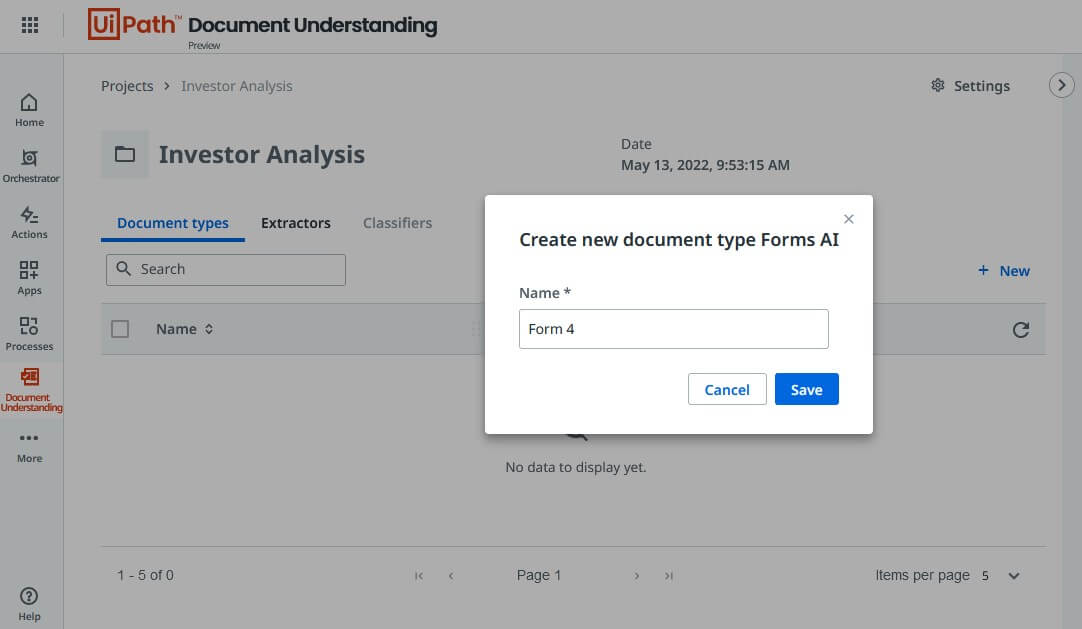
Once you click on the Save button, you'll automatically get redirected to the importing documents screen.
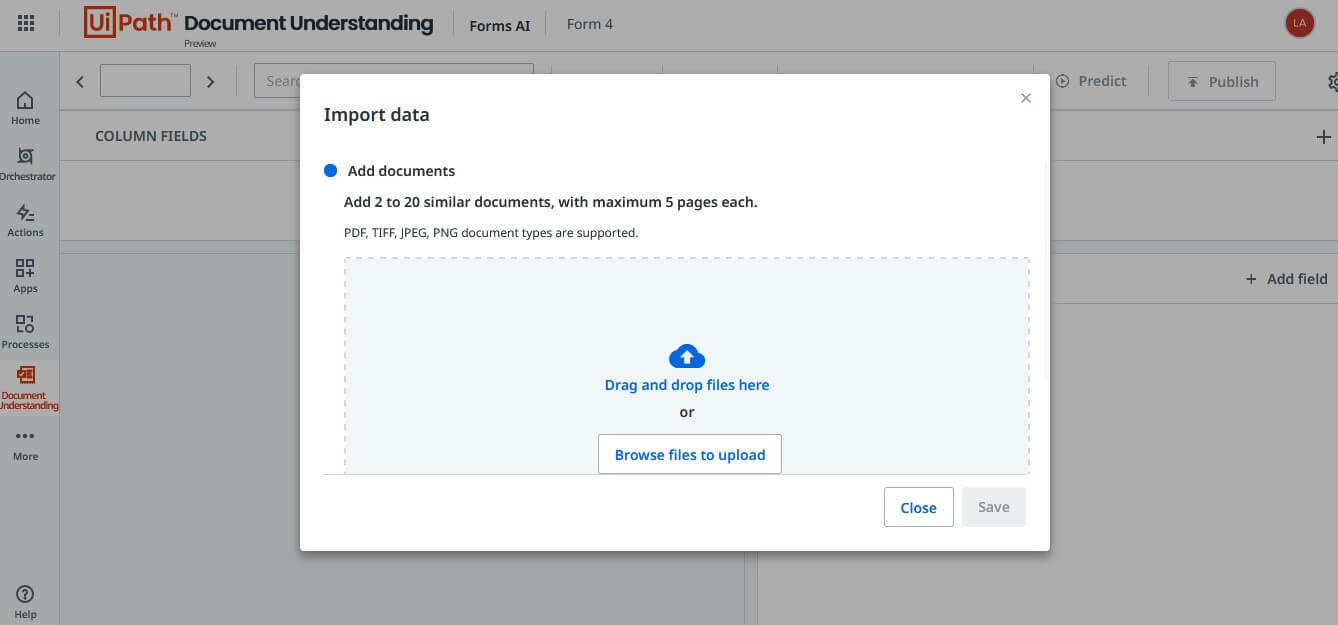
The Document Collection screen is very similar to the Document Manager, previously known as Data Manager. Your screen would look similar to the following.
Step 1.3: Upload documents into the collection
Now, we need to drag and drop all the documents to build our Forms AI model.
Important note: You must create a new model for each document type. Only documents similar in format can be used to build the model (for example, the same form filled in with different data).
Drag and drop the files and click on the Save button to complete your upload.
Once the files are uploaded successfully, click on the Close button to continue with form creation.
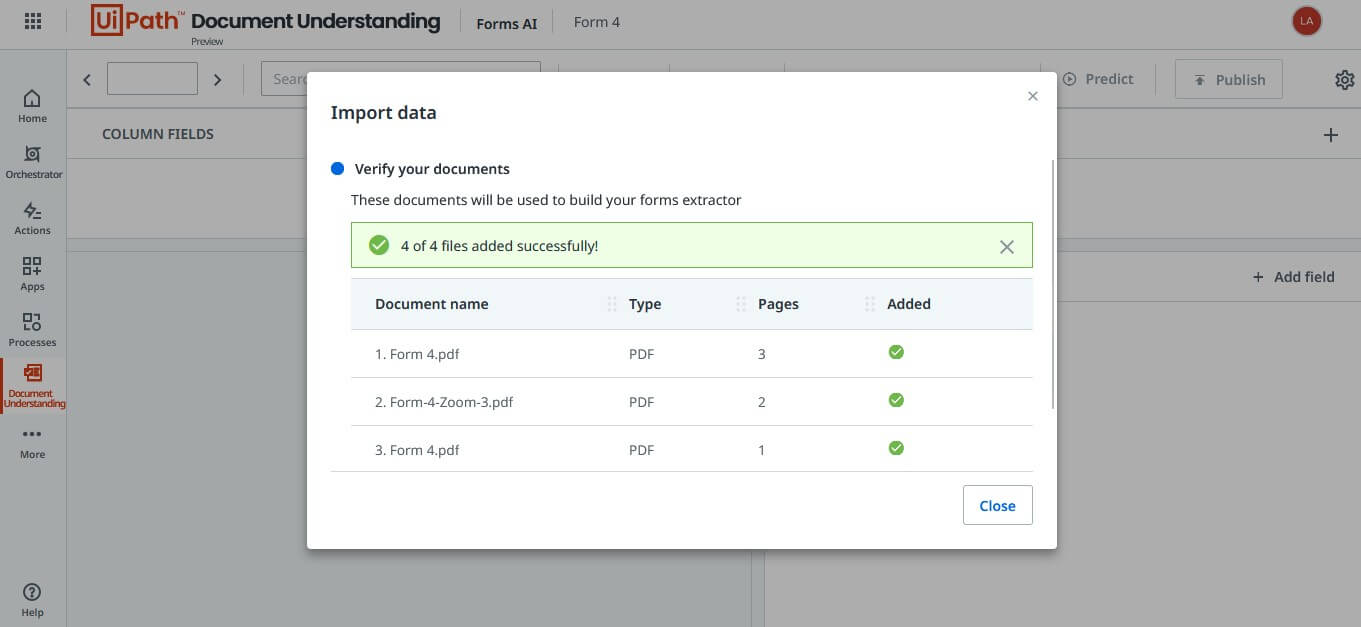
By now, the template has automatically been created for you in the Collection. Furthermore, the data from the first document is also auto-extracted into their respective fields. All you have to do now is remove the unwanted fields and complete the template structure. The following screenshot shows the first extraction.
Note: You can see the progress of the file import through the upload progress indicator, as well as errors, or logs, if you click on the Import button again for another import.
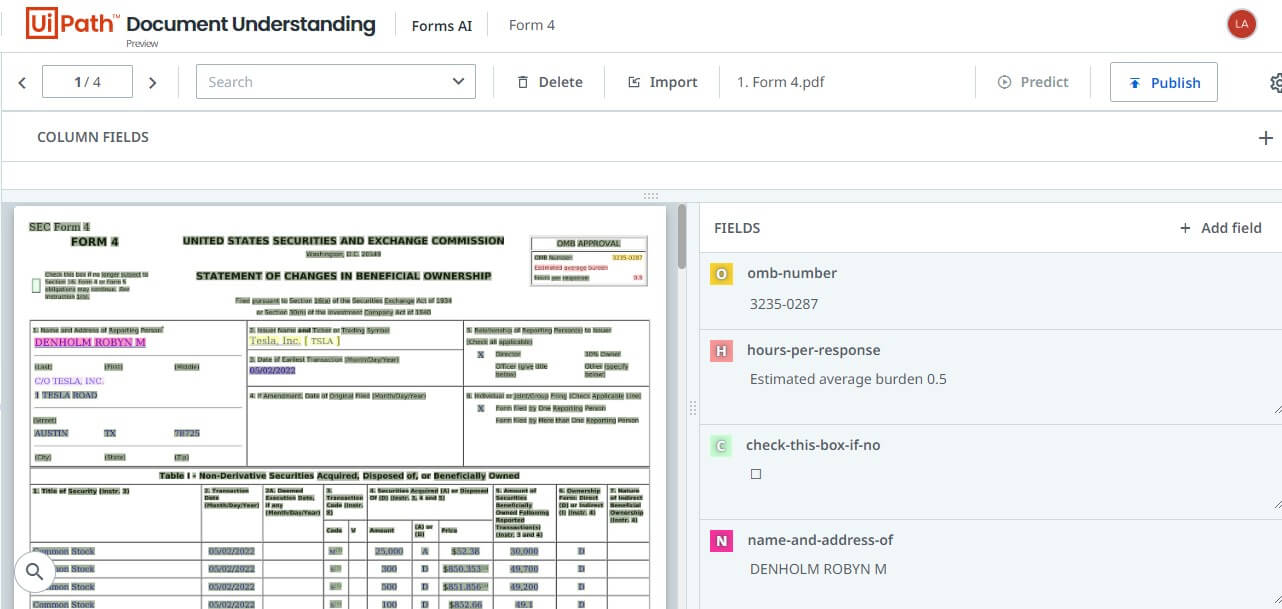
Step 1.4: Configuring the form
Automatic form generation works for regular fields. However, we need to configure the table (line items) manually on the first few documents so it can predict the rest automatically. You can also try renaming the regular fields by clicking on the edit icon that appears once you hover the mouse over any field. Additionally, ensure you check each field for its Content Type and provide the appropriate Content-Type to suit the data. For example, if the field contains a date, set the Content-Type as "Date" to format the value in the standard date format "yyyy-mm-dd".
Important point: remember to use lowercase letters, no spaces, and use dash "-" or underscore "_" when renaming your fields. Use of numbers is allowed, but ensure you do the renaming in a meaningful way.
Besides, if any of the values aren't extracted accurately, you can easily correct this by highlighting the value on the document and pressing the shortcut key specified next to the field name.
Adding New Regular Fields
Adding new fields and assigning values to them is very easy. Let's first try with regular fields.
1. Click on the Add Field button under regular fields to create a new field.
2. Provide the column name to create the field.
3. Locate the field in the designer, and click on the Edit option if you want to change the data type of the field or the shortcut key.
Adding new column fields
Let’s try adding the table columns for the first table. . It's important to note that all or most of the values we extract should be present in all the documents we use for training. For example, if one document has six rows and another has three, all the rows should be captured to train the model . Let's follow the following steps.
1. Click on the "+" icon under the Columns section of the form to create a new field.
2. Provide a column name. in our scenario, we'll create three fields with the name "title", "transaction-date", and "amount".
3. We have an additional property in column fields that we can use to detect individual rows when predicting. Let's configure the first column with this property. Click on the Edit button to access the configuration screen.
4. Enable the "Split Items" checkbox to enable line breaking as shown in the following screenshot. This option is mostly used when the line item contains multiple lines of text.
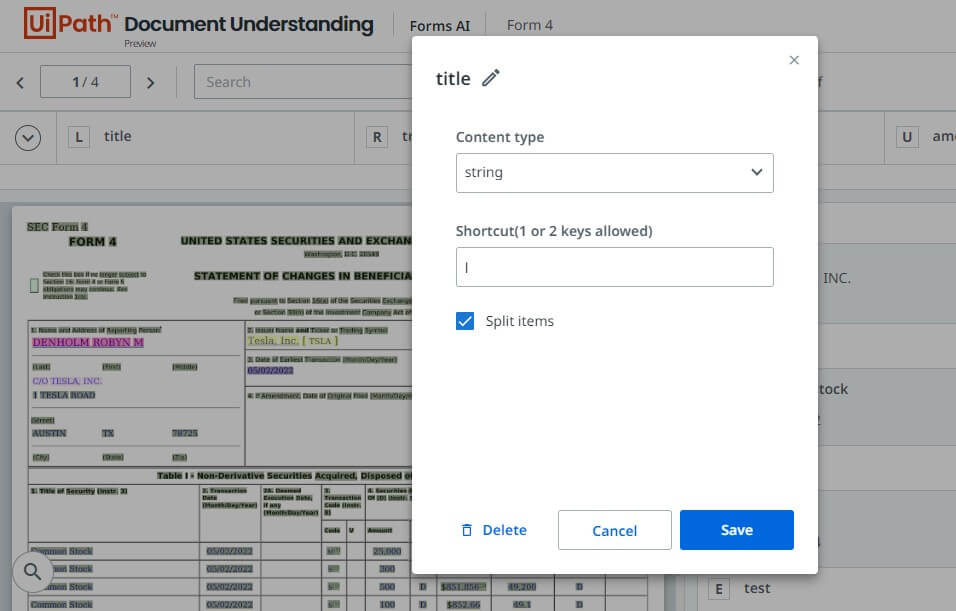
5. Highlight all the elements in the first row of the table.
6. Keep doing the same thing for all the rows individually.
7. Highlight all the items that belong to the first column and click on the shortcut key to add them as individual rows to the column. Continue doing that for the remaining columns to have all the items in the table. The following screenshot shows the first configuration.
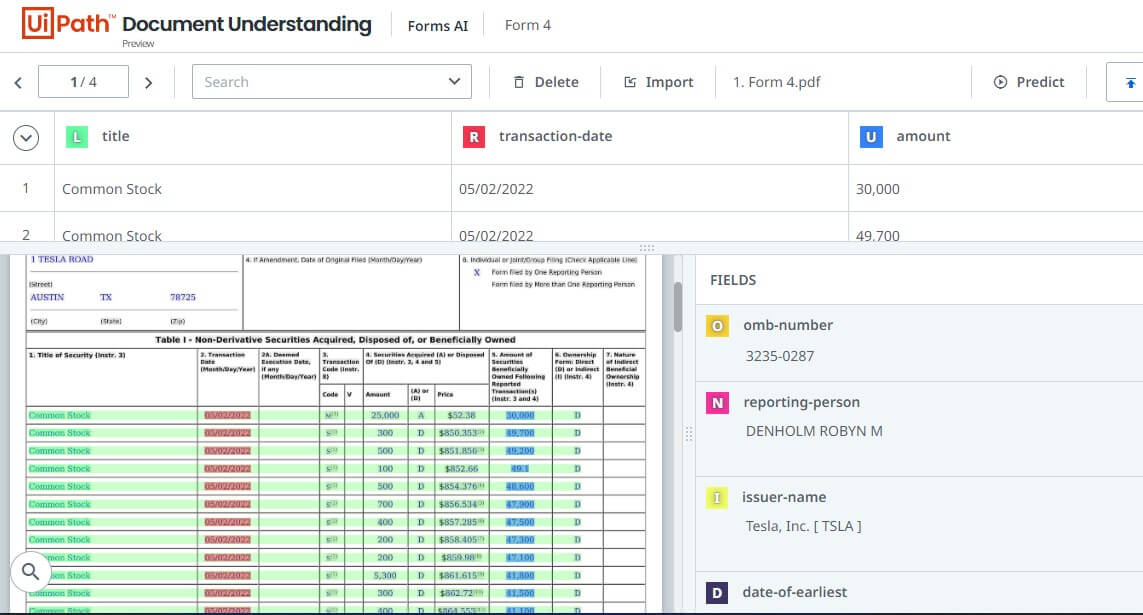
All you need to do now is navigate to other documents and hit the Predict button to auto-generate the model for those.
Important note: Provide all the values of interest are present in each document used for training so that the model can learn from all variations, especially in tables.
Step 1.5: Publishing the model as an extractor
This step is straightforward. Once everything is configured, just hit the Publish button to get the model published . You'll be asked to provide a name for the Extractor. Guarantee to give a meaningful name for it. Once the publishing is complete, you should be able to see the model with the status "Available," as shown in the following screenshot.
Remember that you will need an endpoint (URL) to access the Extractor you created from the UiPath workflow. You can copy the endpoint right after you publish or click on the three dots next to the Extractor on the Extractors page.
Step 2: Building the workflow
UiPath Studio Web provides an easy-to-use interface to create a simple Document Understanding workflow to process the documents. Before starting the development, let's upload the files we need to process into a folder in OneDrive.
Step 2.1: Accessing Studio Web
Access Studio Web as shown in the following screenshot.
Step 2.2: Creating Studio Web workflow
Once you are in Studio Web, the first thing to do is create a new project.
Click on the New Project, provide a name, and create a project.
1. Use OneDrive For Each File/Folder Activity as shown below and configure it to point to your OneDrive.
2. Within the body of the Activity, place the Extract Document Data Activity and configure it as shown in the following screenshot. You can create new Variables to hold the output values returned by the Activity.
3. Let’s use a Write-Line Activity to look at the output. Configure the Write Line as below using the variable names you provided in the Extract Document Data Activity.
4. Let’s run the process by clicking on the Run button and examine the output generated on the console.
Conclusion
Processing structured documents requires template creation and this takes time and effort. Forms AI provides seamless template creation and training models with a simple click of a button for us to handle such scenarios easily. The extractors made on Forms AI can easily plug into any Document Understanding workflow without any additional effort to extract the data.
Country Director, Boundaryless Group
Get articles from automation experts in your inbox
SubscribeGet articles from automation experts in your inbox
Sign up today and we'll email you the newest articles every week.
Thank you for subscribing!
Thank you for subscribing! Each week, we'll send the best automation blog posts straight to your inbox.


