How to Organize Modern Folders in UiPath Orchestrator

Introduction
We're all familiar with the concept of folders that we use daily within our systems. Simply put, folders help us organize and segregate our work meaningfully. Take a look at the following examples to see how modern folders in UiPath Orchestrator can solve a variety of use cases.
How to organize modern folders
The UiPath Orchestrator comes with the default folder as well. You can keep creating your automations in this folder, but it is like keeping all your files on the C drive of your Windows machine. This would make our routines cumbersome, isn’t it? The modern folders in UiPath Orchestrator are an efficient way to work for a variety of use cases that one may encounter. Let's acknowledge a few examples.
1. Do you need a personal workspace for yourself to test and deploy your packages before publishing it to the tenant level?
2. Do you need to work on a feature release and get it tested/moved independently without affecting the main automation?
3. Do you want to release your process to a subset of users before opening it to the wider audience?
4. Do you need a way to separate the automations across the different departments within the same organization? For example: 5. Do you want the finance team automations to be visible to the marketing team and vice versa?
6. Do you have multiple departments within your organization with sub-levels under each department and do you need a logical separation for the automation artifacts at the sub-department level as well?
The folders allow us to manage the different Orchestrator resources (e.g., Processes, Jobs, Assets) that stay within each specific folder. Additionally, it also has access to Tenant-level global resources such as:
1. Robots
2. Folders
3. Machines
4. Packages
5. Libraries
The Orchestrator resources can be easily added to multiple folders of a hierarchical structure and switching between the folders will switch the corresponding resources immediately.
How is this different from creating different tenants within Orchestrator? The tenants allow you to isolate data within the same Orchestrator. The folders allow you to have a fine-grained control over automations and their intrinsic artifacts like processes, assets, queues etc. within the tenant. The following are the two sample approaches for folder set-up that can be adopted depending on client requirements. There's no right or wrong approach and UiPath provides the flexibility to adopt the appropriate approach as per the business needs.
Sample approach
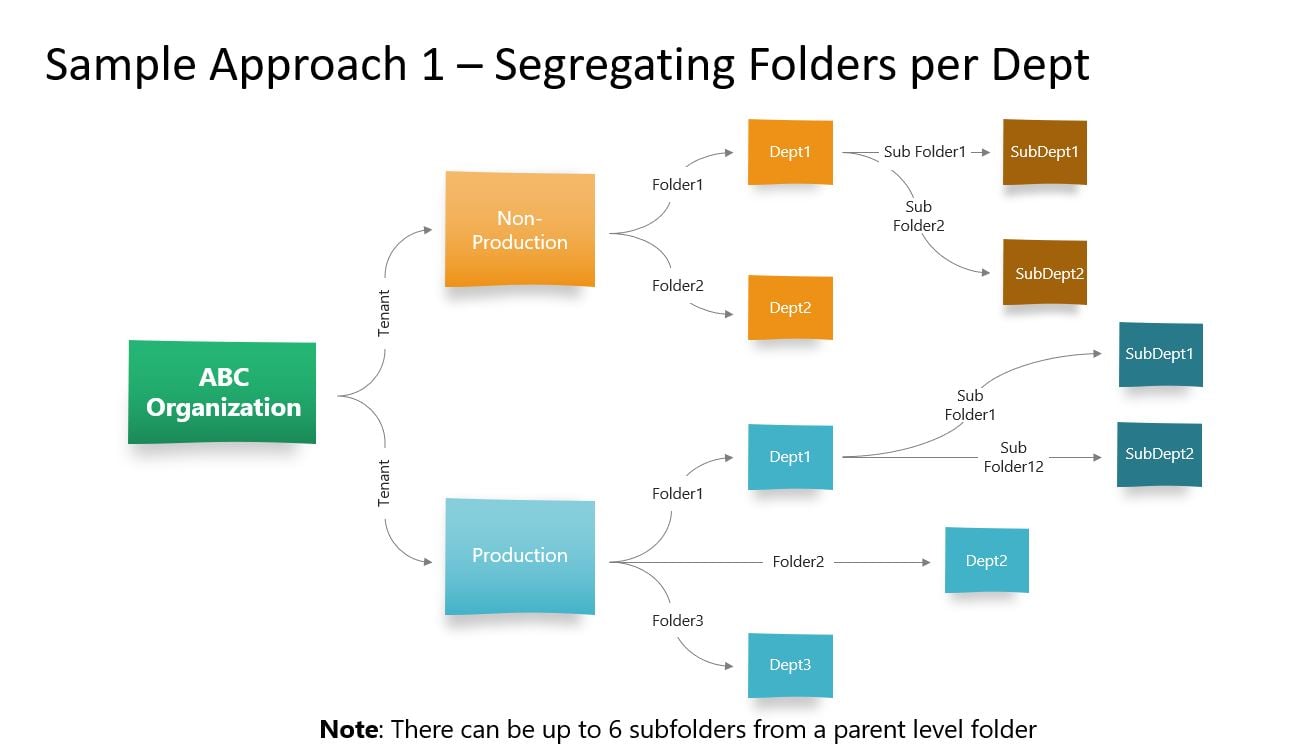
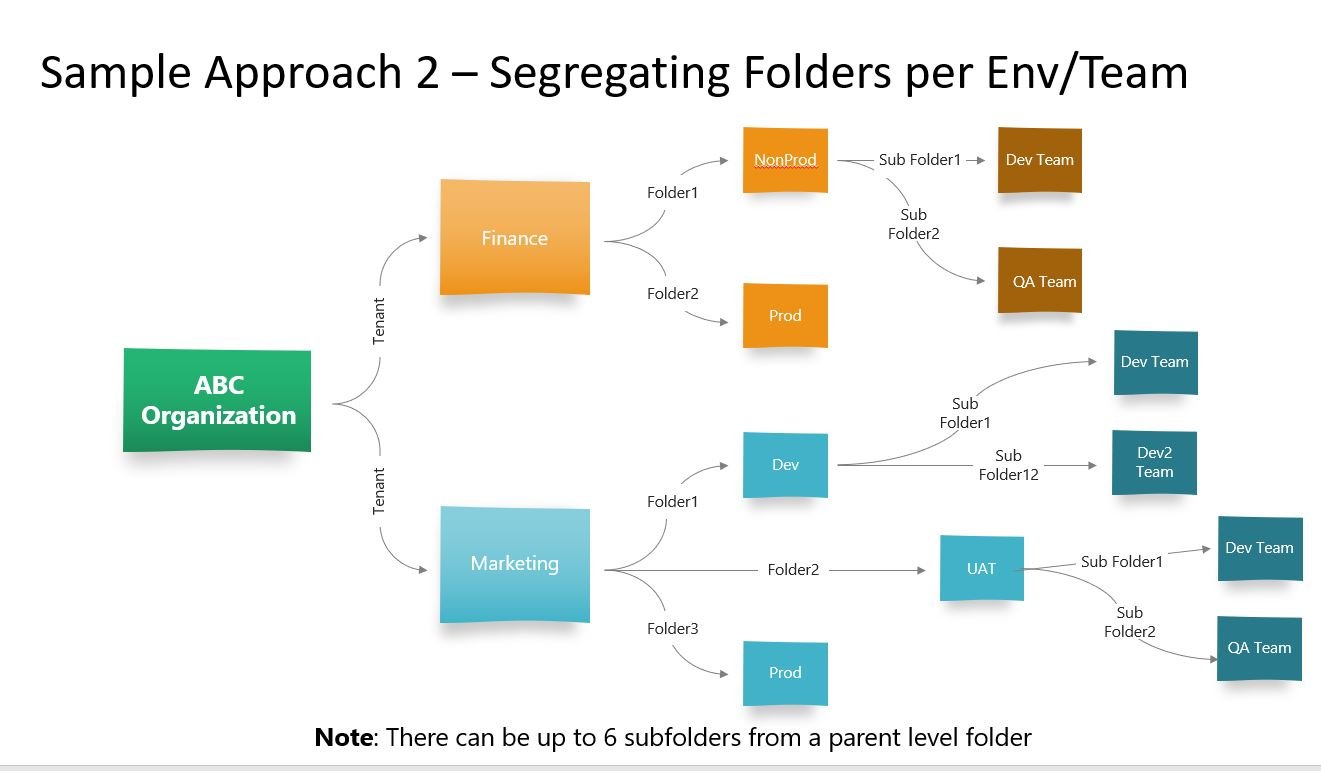
As the same cloud organization name is assigned for a client, you might as well use the different tenants to segregate your non-production and production environments as shown in the approach 1. This is a personal preference as it becomes easier to manage the different environments within the same Orchestrator. For some clients, they might want to create different tenants per business unit and then segregate the non-production and production folders as shown in the sample approach 2.
Tenant and folders
The UiPath Automation Cloud comes with the DefaultTenant as the default tenant option. One can start by renaming it and adding tenants as well.
For example: by navigating to Admin->Tenants->Tenant Settings (by clicking the ellipses), you can rename the Tenant Name. So, as shown below you can rename or Add Tenants from this screen.

To create new folders, you can click on the Tenant-> Folders option and give the appropriate name for the folders.
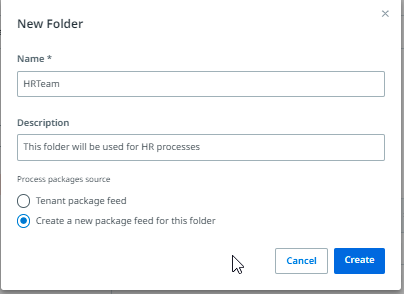
Please ensure that you select the “Create a new package feed for this folder.” This will allow us to manage and publish our process independently as a folder specific resource. On selecting this option, you'll notice that the “folder Packages” mentioned below the folder name (which isn’t available if you select the Tenant Package feed).

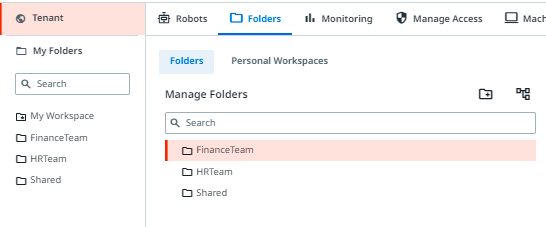
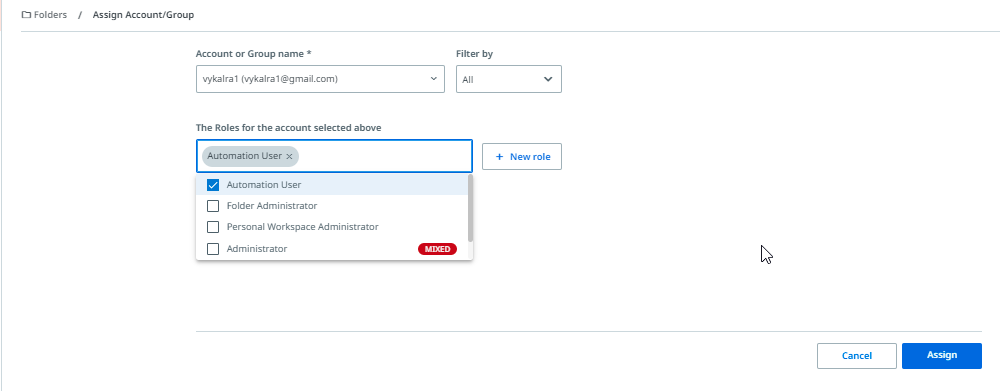
Now, from the folders above, we may want to restrict access to the FinanceTeam folder for the Finance team members. Clicking the Assign Account/Group button under the Folders -> Manage Folders option can do this. I have assigned the Finance team member to this group.
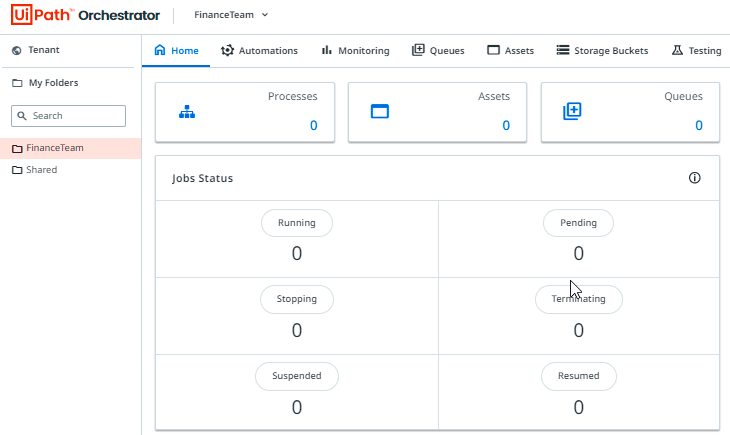
Now, when the Finance team member logs into the Orchestrator, he/she will see the FinanceTeam folder as below. Thus, it becomes easy to segregate the artifacts at the folder level.
Deployment to the folder
As a developer you need to ensure that you select the correct folder if you need to deploy the process from UiPath Studio.
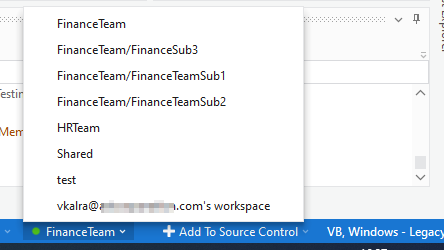
This provides that the package is deployed in the respective folder. For example: FinanceTeam folder in this case.

The default roles available in the Orchestrator can be at the Tenant level or folder level or mixed (which includes both Tenant and folder level permissions). With mixed roles, the user’s tenant permissions are considered. In the example above, if we assign folder Administrator role to the Finance user, then the user will have all the permissions as mentioned under the folder administrator role in the UiPath Documentation Portal.

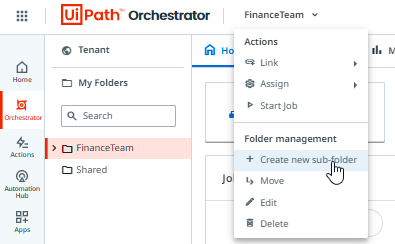
So, when we give this folder Administrator role to the Finance user, the user will also can manage the entire folder. For example, the user can create a new sub-folder from the Orchestrator as below.
Conclusion
Thus, we can see that using the folders along with the appropriate roles provides flexibility and control for automation artifacts. If you aren't leveraging the folders within your Orchestrator, then you are missing the fine-grained control that you can exercise for your automations. The approach to be taken for your tenant and folders set up should be something that should be discussed during the design phase of the project. Nevertheless, if it isn't done yet, as we've seen above, there's still an option to better organize your processes using folders after a discussion with your customers.
Topics:
OrchestratorArchitect , Applications Software Technology LLC (AST)
Get articles from automation experts in your inbox
SubscribeGet articles from automation experts in your inbox
Sign up today and we'll email you the newest articles every week.
Thank you for subscribing!
Thank you for subscribing! Each week, we'll send the best automation blog posts straight to your inbox.


