How to Assign Robots in UiPath Orchestrator My Workspace Folder

In this automation tutorial, I'll walk you through one way of working with the My Workspace Modern folder using the free resources made available to UiPath Community users.
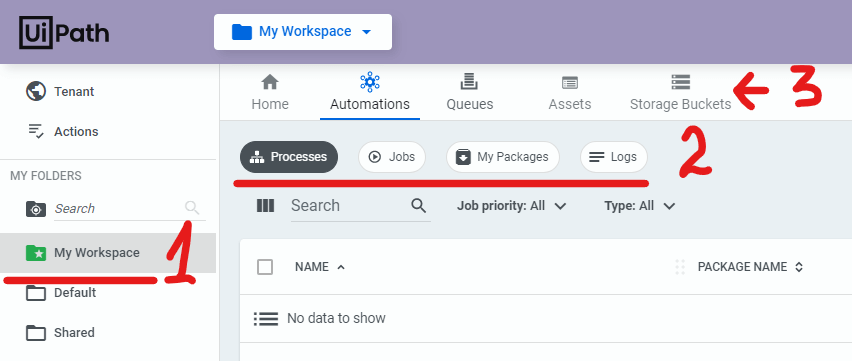
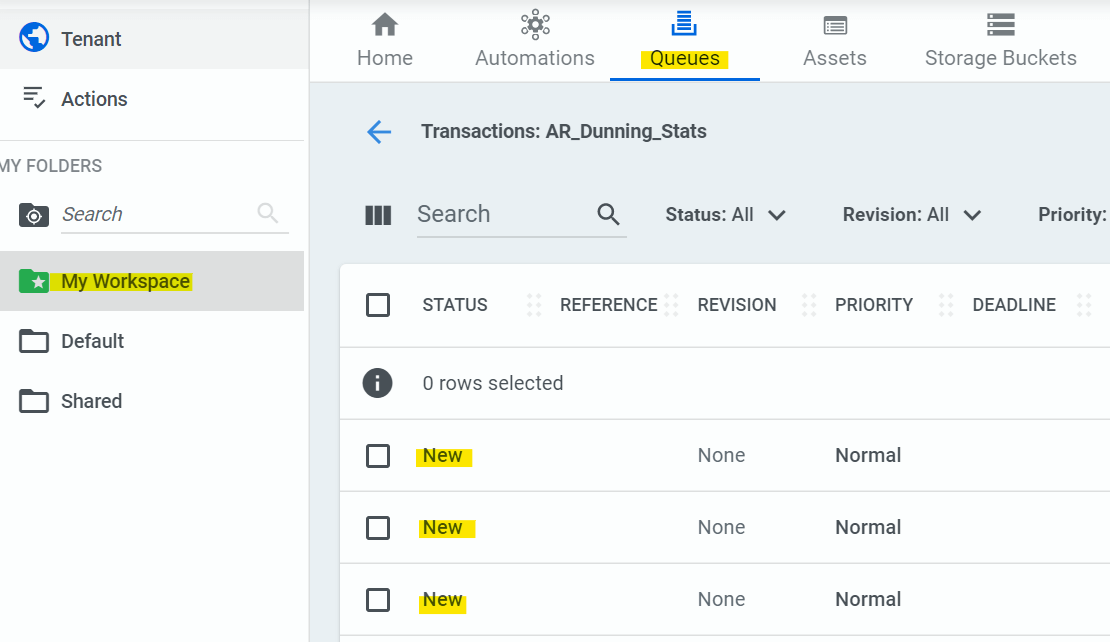
My Workspace (see number 1 in the image below) is a “ready-to-use” Modern Orchestrator folder created automatically when an Orchestrator Service is instantiated. It is available for dedicated use by a particular user (or group) working with Attended robots in modern folders.
To note:
The folder has dedicated/isolated access to Package feeds, Processes, Jobs, and Logs (see number 2 in the image above).
Like any other Modern folder, it has no Robots or Environments features (see number 3 in the image above).
Auto provisioning processes in My Workspace folder
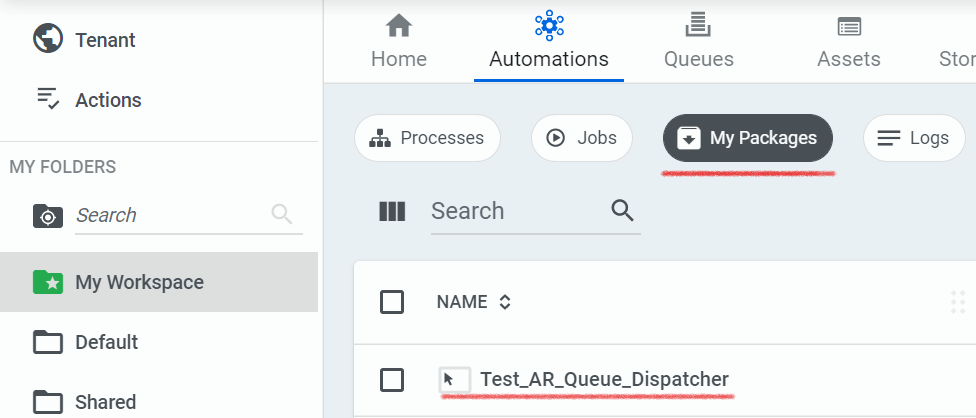
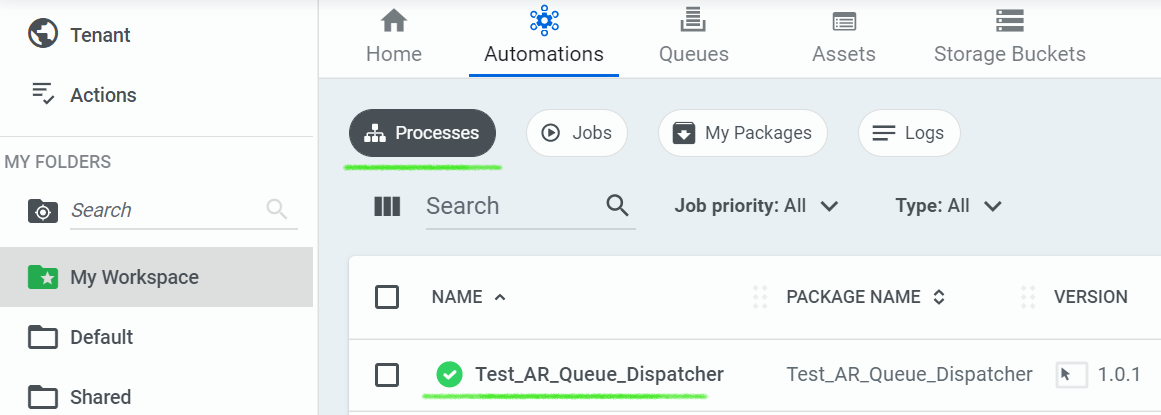
If packages are uploaded to the My Workspace folder from the My Packages screen, a process is automatically created under the Processes section of the folder.
In this case, the process TestARQueue_Dispatcher is automatically created when a package with the same name is uploaded to the package feed.
Likewise, when an updated package version is uploaded, its corresponding process will also be updated automatically.
Assigning Robots to My Workspace folder
By default, the My Workspace folder is assigned a Default Machine Template as shown below:

The Machine Key (2 in the image above) can be used to establish connection to this machine from the users laptop or virtual machine (VM). However, connecting using the machine key will indicate that you are connected but unlicensed (3) as shown below:

That is because a Robot (license) needs to be assigned to the users having access to the My Workspace folder. By default, users will not have any Robot licenses assigned (see 4 in the image below) as indicated by their Disabled Robot Access:

Robot assignments can be made at a user level (see 5 in the image above) or group level.
Assigning (Attended)* Robots at Group Level
*NOTE: Unattended Robots cannot be assigned at Group Level as discussed in the next section.
Step 1: Enabling Interactive Sign-In
Before assigning Robots at the Group level, Interactive Sign-In must be enabled, if not already enabled by default.
In UiPath 2021 Orchestrator, it is enabled by default. To check for or enable this setting, login to the Tenant and check the Security settings as shown below:

If the first checkbox ("Allow both user and robot key authentication") is enabled, it means interactive sign-in is already enabled.
Step 2: Assign Attended Robots at Group Level
It is more practical to assign Attended Robots at the Group level. In this example, let us consider assigning Robots to the Administrator Group. Editing the Administrator Role will display the following options:
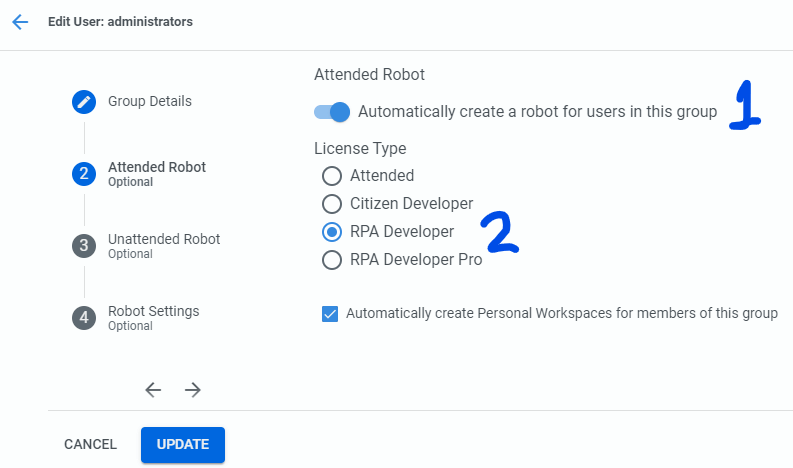
By default, the Automatic Option is disabled. If Auto Option for the Group is enabled (1), the type of Robot offered will be RPA Developer (2), and that may not work unless you have an RPA Developer license. In the latest Community version of UiPath, the only types of User licenses allocated (3) are Attended-Named User and RPA Developer Pro.

The Robot licenses allocated (4) are Unattended Robot (1x) and Testing Robot (1x), as seen below:

In this case, we will be assigning Attended Robot licenses automatically to members of the Administrators group. To do that, we begin by altering the settings for the administrators group, as shown below:
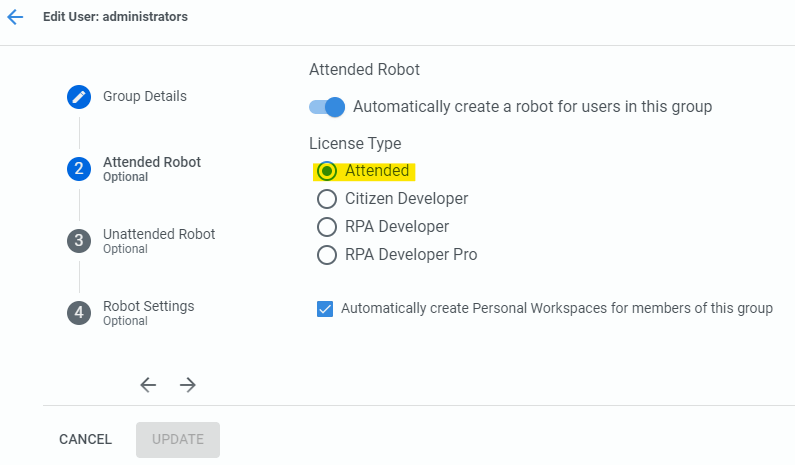
Save changes to the group settings by clicking Update and exit.
Step 3: Update User Settings
In this example, the default Admin user is a member of the Administrators group. Therefore, we will update the settings for this user to inherit Robot allocation settings from the parent group as shown below:
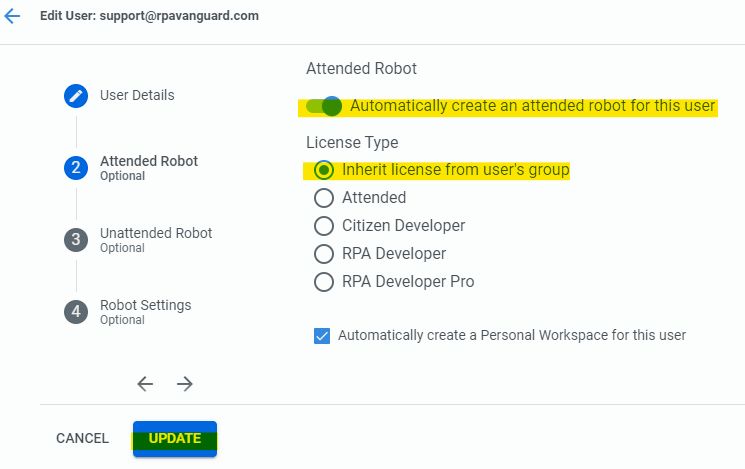
Click Update to save user settings and exit.
How are Attended Robots assigned automatically?
If you go back to the User settings in the previous step and select the Attended License Type radio button, you will see how the login username is assigned to the Attended Robot license automatically, using a domain named autogen.
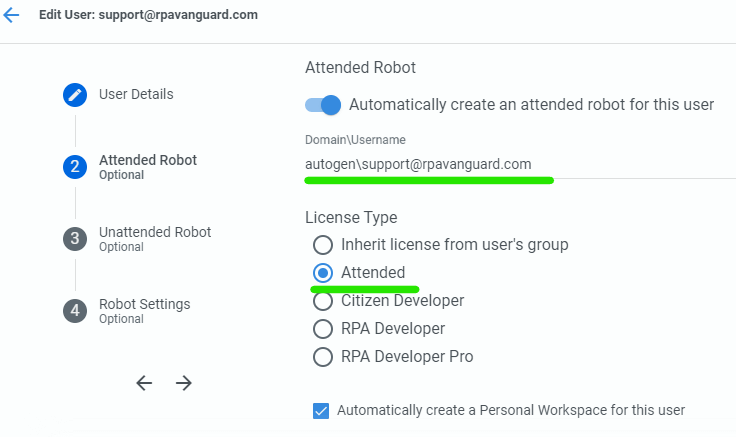
If you remove this auto-generated username, a message will be displayed under the Domain\Username field like so:

This field can be left blank, but for licenses to be auto-assigned, the user has to login via UiPath Assistant using the Service URL and the login email address.
To confirm, click the Update button after removing the auto-generated Domain\Username, and your changes will be Saved successfully.
Note that the Interactive Sign-in differs from the traditional login using a Machine Key because it does not hardwire the users machine name, the Domain\Username (say, rpavanguard\support), and a machine key together.
Practicality of assigning Attended Robots at Group Level
In practice, many Attended Robot users can be grouped under a non-Admin group, such as Automation Users. And this group can be configured to automatically assign Automated Robot licenses. Each member of this group will be assigned a Robot using the auto-generated Domain\Username when logged into the Orchestrator via Interactive Sign-In.
Step 4: Clear previously signed-in cookies
If you have logged into multiple tenants from the same machine and not logged out fully, then logging in with another account from UiPath Assistant (or UiPath Studio) using interactive sign-in can become problematic because the cookies will never give you the opportunity to enter the username of your choice.
In the example below, this machine has been frequently used to login to a tenant that belongs to username admin@rpavanguard.com. If cookies aren’t cleared out, or if a complete logout from both the Tenant and Automation Cloud™ are not performed, the login box below will never show up in the browser when you are signing in from UiPath Assistant or Studio.
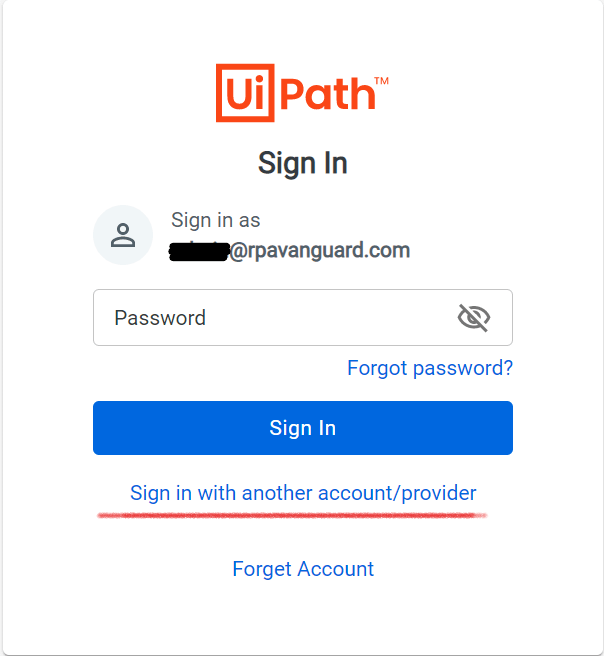
Instead, you will be logged in directly into the Tenant belonging to admin@rpavanguard.com instead of support@rpavanguard.com, which is not the desired outcome. Therefore, clear the browser cookies before attempting to login from UiPath Assistant.
Step 5: Connecting to Orchestrator using Interactive Sign-in
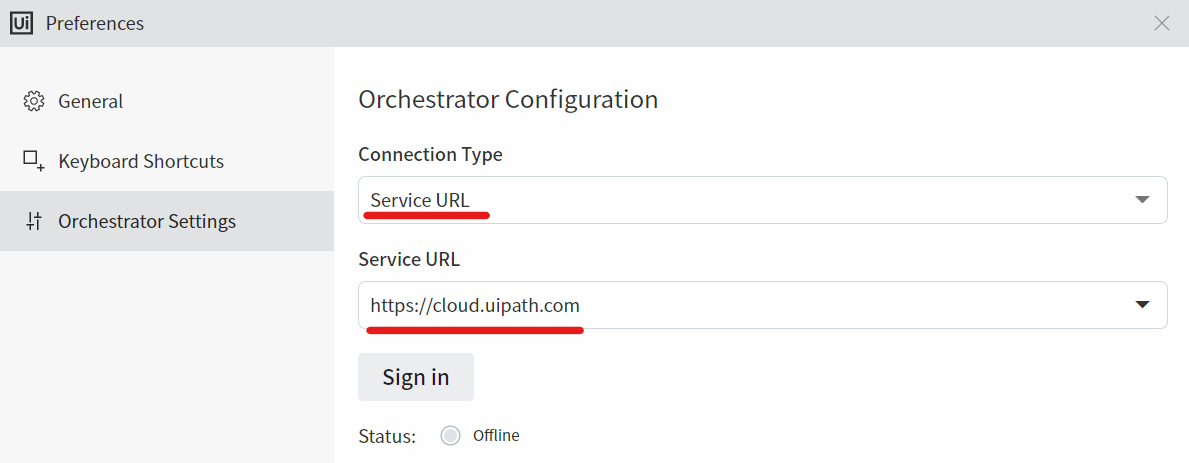
Once the cookies are cleared, return to the Orchestrator Setting in UiPath Assistant and login using the Service URL option as shown below:
A login dialog will be displayed in the browser. As the cookies have been cleared, you will select the option to login using a different account/provider.
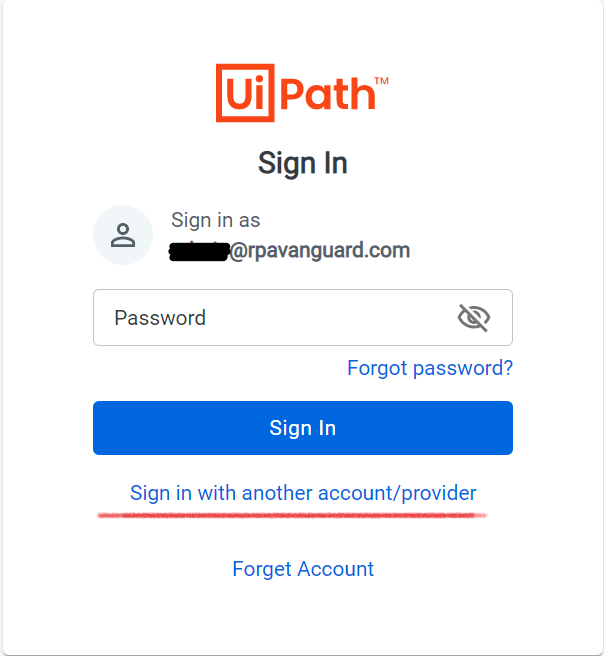
Logging in using the username support@rpavanguard.com should connect the Assistant to the Orchestrator via Interactive Sign-in.
As this username is a member of the administrators group, it is automatically assigned an Attended Robot on login. The Connection status will indicate “Connected, licensed” and this status above all will confirm that an Attended Robot License has been automatically assigned to your username support@rpavanguard.com, and the license will remain in effect as long as you are actively connected to the Orchestrator.
Step 6: Running Attended Automations
If one or more processes have been deployed to the My Workspace folder, they will be visible in UiPath Assistant on successful sign-in, as shown below:
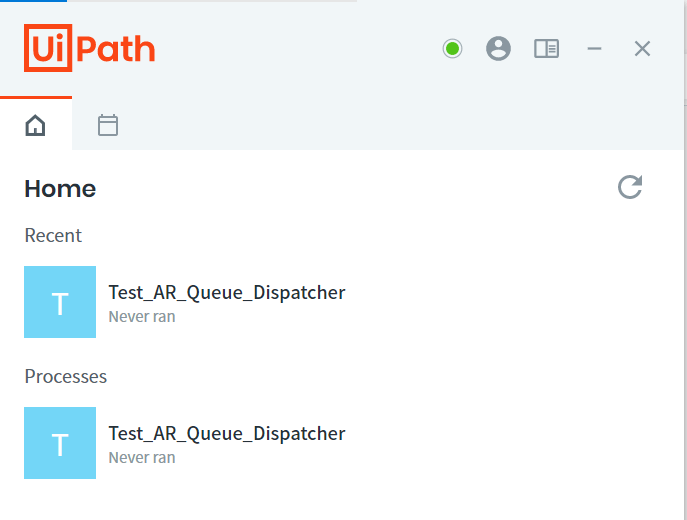
When you run the automation, it will be executed by the Attended Robot assigned to your sign-in. In this case, we can see that the Robot has run the automation to post several items to a queue created under the My Workspace folder.
Step 7: Working with Studio
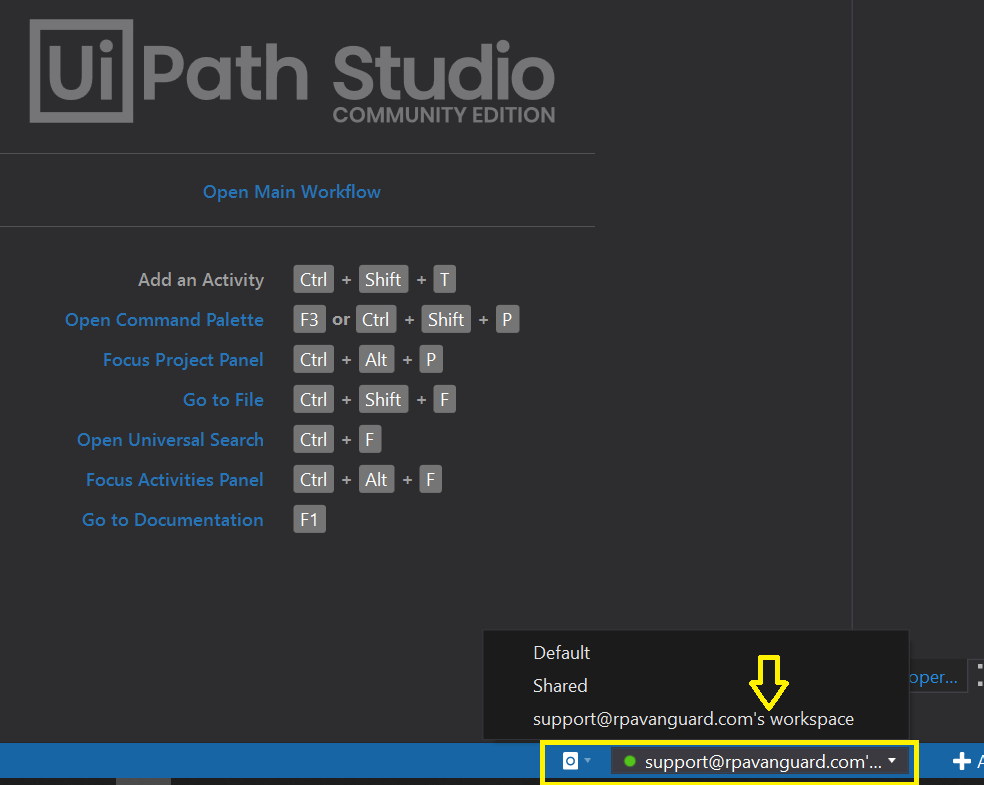
If Studio is opened when connected to the Orchestrator in Interactive Sign-in mode, the connection will be confirmed with your username (and the active workspace name) on the bottom-right of the Studio IDE as seen below:
Assigning Unattended Robots
As indicated at the beginning of the previous section, Unattended Robots cannot be assigned at the Group level as shown below:
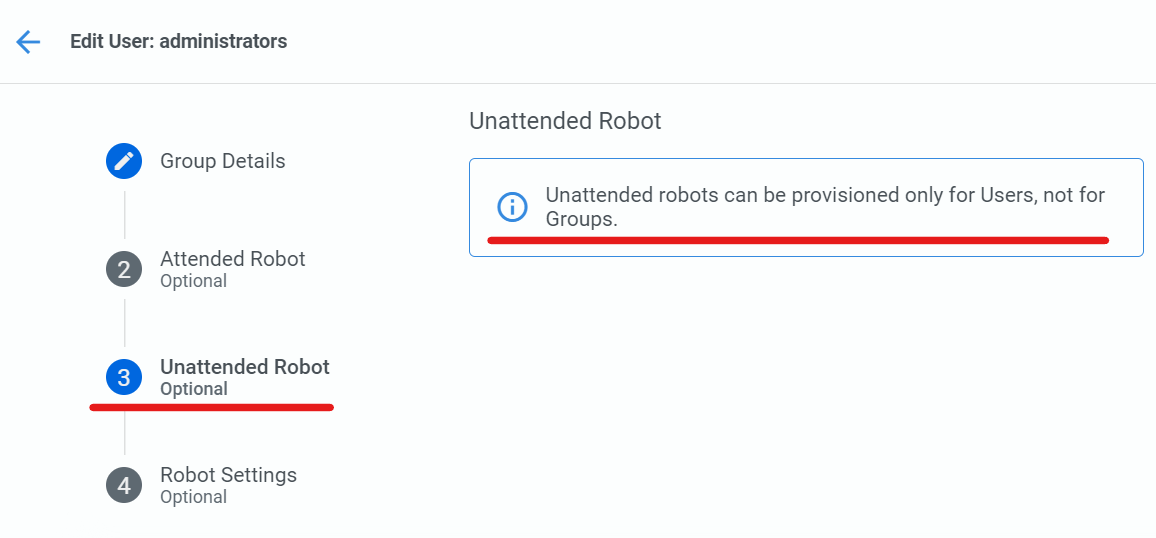
Instead, the assignment must happen at the user level. Also, as previously mentioned, the Community License assigns only one Unattended Robot license. In this example, we will be working with the same user as before, just to demonstrate the license allocation process. In practicality, the Unattended license would be assigned to a username that represents a machine or VM that would run unattended automations without human intervention.
Step 1: Confirm that Unattended Robot is not assigned
If an attempt is made to run the process directly from the Orchestrator, it will result in an error, as shown below:
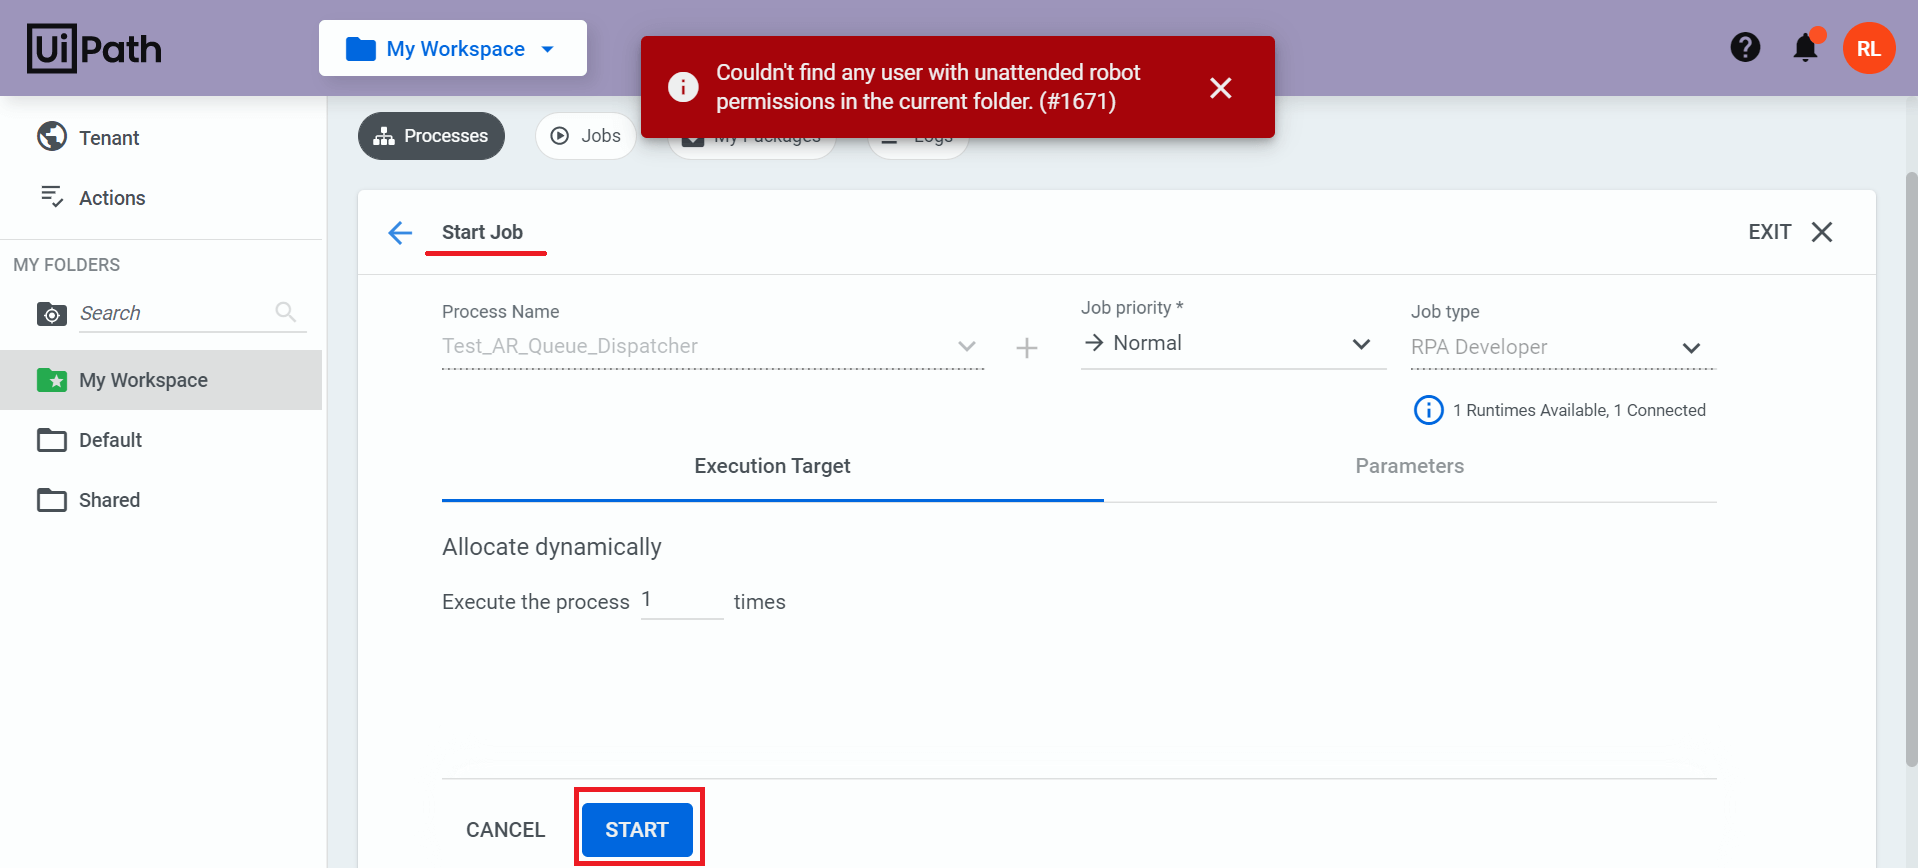
This error confirms that an Unattended Robot license has not been assigned to the current user.
Step 2: Assign Unattended Robot to User
If you open the user settings, and enable the slider in the Unattended Robot section, the Domain\Username will display the auto-generated values corresponding to the interactive sign-in for Attended Robots:
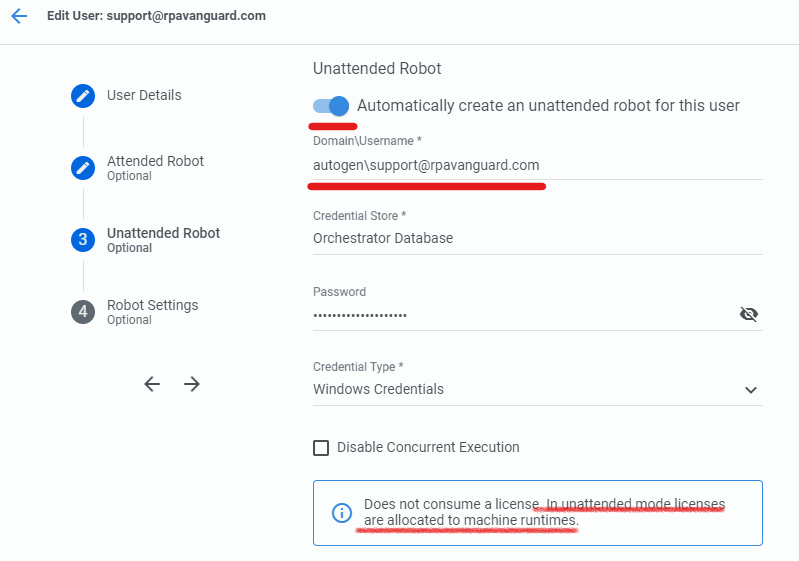
As we are assigning an Unattended Robot, the Domain\Username (and the password) must be changed to those belonging to the machine or VM on which unattended automations will be executed.
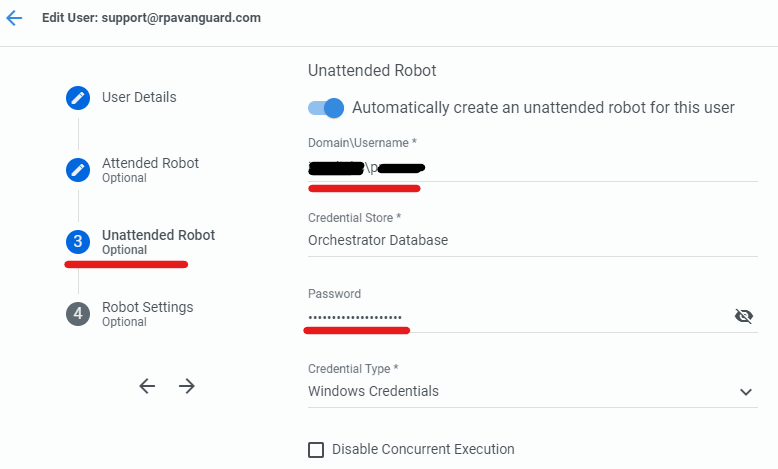
Once these settings take effect, you will be able to run the process deployed to the My Workspace folder as an Unattended Automation directly from the Orchestrator, via Assistant, or via a trigger.

Conclusion
In this article, you have learned one way of working with the My Workspace Modern folder by using the free resources made available to UiPath Community users. The Attended/Unattended License allocation scenarios covered in this article should give a fair idea of managing larger and more practical implementation of UiPath environments.
Data Integrations engineer, Intralinks SS&C
Get articles from automation experts in your inbox
SubscribeGet articles from automation experts in your inbox
Sign up today and we'll email you the newest articles every week.
Thank you for subscribing!
Thank you for subscribing! Each week, we'll send the best automation blog posts straight to your inbox.


