Using UiPath Autopilot™ for effortless app development

UiPath Autopilot™ is making the experience easier for the developers and it also gives non-technical users many ways to develop. Autopilot is for everyone, whether you're a developer or a business user. You can find Autopilot emended across tools like UiPath Studio, Apps, Test Suite™, and more. In this article, we'll focus on some of the ways you can use Autopilot for Apps to quickly and easily create web forms with built-in validation.
Let's begin.
Our quality department maintains a series of checks in an Excel sheet that involves a lot of time. The current process uses an Excel sheet where the quality department checks manually, and the sheet fills out the Yes/No values for different quality parameters. The quality department wants to make a form so that users can go to this form and enter these values. Traditionally, the application developer would have had to create the form by moving each of the controls and creating the form using App Studio. But let’s see how Autopilot can shorten this timeframe!
Go to the Studio on UiPath Orchestrator. You will see the following section of “Generate with Autopilot" and a section to enter the relevant prompt into it.

Give the prompt the information for Autopilot to make the form for you. Just click Send. For example, I gave the following prompt.

"Create a car inspection form with the quality check fields in two columns and possible answers of yes or no. There will be the following 5 sections in it. 1.Exterior Inspection 2. Interior Inspection 3. Mechanical Inspection 4. Electrical Inspection 5. Final Checks".
You will need to wait for a few seconds for the App to be created (this will depend on the prompt that you give and the amount of app fields that need to be generated based on the prompt).

Note that your output may differ based on the prompt that you give or even within the same prompt. If you are not satisfied with the result, you can try and give the prompt again by hitting the browser back button twice.
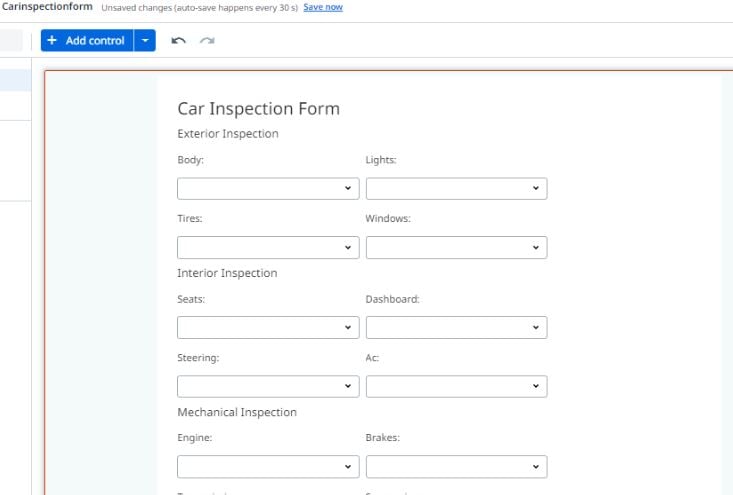
This should then create the form for you. For example, the following is the form created for my prompt.

Now, you can validate and add or remove any questions as needed. As you can see, Autopilot created the entire form along with its corresponding Entity as well.
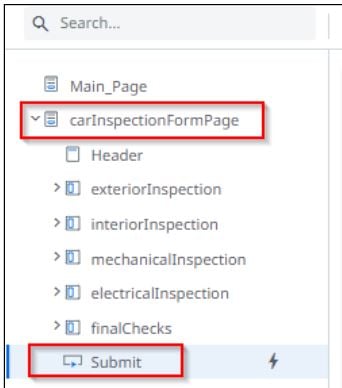
Click on the Submit button that can be found under the carInspectionFormPage and go to the Events section for it.

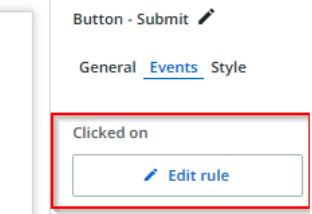
Next, click the Edit rule.

Let's see how we can use Autopilot to make an expression that will throw an error message if any of the field values are No. Yes, we don’t need to know the syntax to write this code.
Just follow the steps as shown in the below image. Here we will use Autopilot to build our expression to check all the fields values by simply giving the following prompt “check if any of this form fields have the value "No” and then enter the appropriate message box.

Now, you can check the form by running the Preview button.

Thus, we can see that using Autopilot for Apps makes form creation a breeze. We used one example for checking cars here, but you can use the same method to make any kind of form. You may also specify the exact fields that need to be added to the form.
Let’s take another example. In this case, I give the prompt with some additional validations
"Create a form with two fields. The first field is a number for age (so it should not let you put in a number) and the second field is the name of the employee (max length 10 characters)."

Autopilot added the rules for Age and Name not being more than 10 characters when it created the form.
Thus, we can see that there are endless possibilities now for easy app creation for everyone.
The best part of it is that your development can become easier with the usage of relevant prompts with Autopilot and also super quick. Curios to explore? Get started with Autopilot.
Topics:
UiPath Autopilot™Architect , Applications Software Technology LLC (AST)
Get articles from automation experts in your inbox
SubscribeGet articles from automation experts in your inbox
Sign up today and we'll email you the newest articles every week.
Thank you for subscribing!
Thank you for subscribing! Each week, we'll send the best automation blog posts straight to your inbox.


