Automations for SAP Business One

Introduction
SAP Business One is a management software designed by SAP and aimed at small and medium enterprises. As with all SAP and other ERP, it’s possible to manage all key business functions such as finance, logistics, sales, human resources and so on. The most recent versions of Business One can be used with the web client (based on SAP-Fiori) for some of its capabilities, but the core product remains the Windows-based client. As of his “older brother” SAP-GUI, Business One contains a lot of processes that could be automated and provide a positive outcome in day-to-day work for the users. Let’s see an example of how to create an automation using UiPath and Business One.
Automation scenario
Finance processes are the ones that come to mind first when thinking about automation. A lot of processes involving payments, reports and budgets can be easily automated to bring a lot of advantages regarding ROI. One simple process that can be automated is massive sales invoice registration, starting with a defined input, such as an Excel file, XML, PDF, or email. In this scenario we consider retrieving data from an Excel file, that contains the following data:
1. Client
2. ID registration
3. Document date
And for every product (two in our example)
1. Product code
2. Quantity
3. Price

This will provide a linear but complete creation of an invoice, that can be adapted to use in real cases.
Prerequisites
To create the automation, it’s necessary to have Business One installed on the machine, and that’s it! Unlike the standard SAP GUI, it’s not necessary to perform any changes to settings, like enabling scripting, since Business One automation doesn’t have a dedicated type of automation.
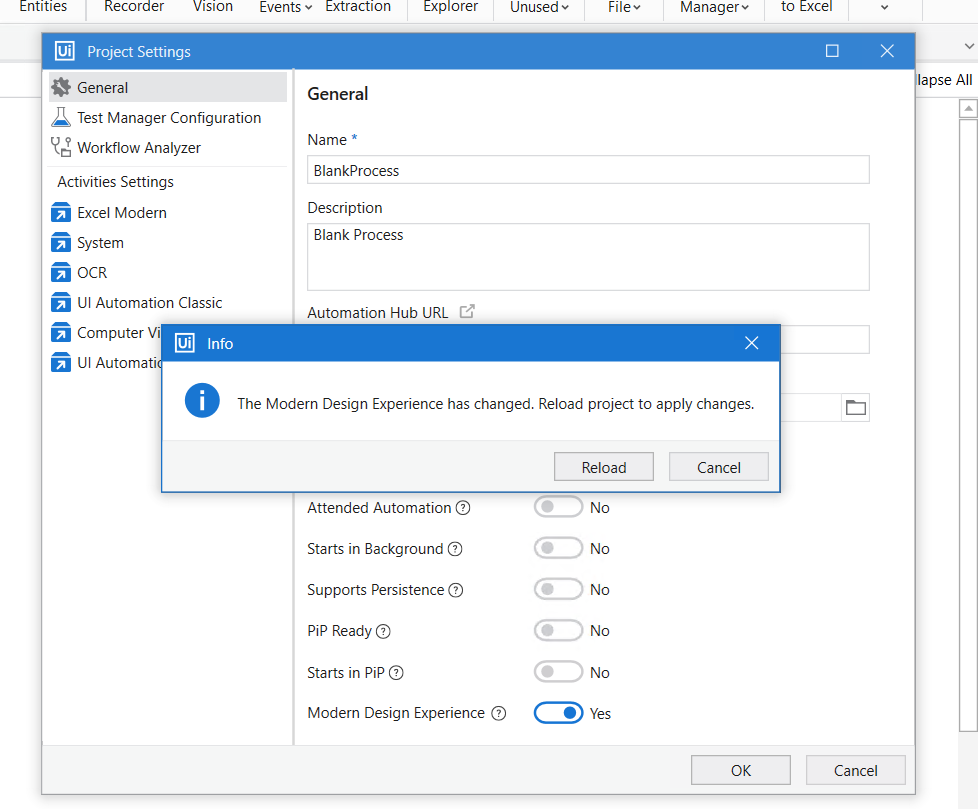
For automating activities we'll use in some occasions the scrape text, which is available directly in UI classic automation. You can change the default automation by going to the project folder and clicking on the Project Settings icon on the top Right. Next go to General Settings and unselect the Modern Design Experience button.
Building automation
1. Launch SAP and sign in
First, you need yo launch the SAP Application. You can spy the icon and double click on it, or more directly you can use Start Process Activity and execute the .EXE

After that, to sign in you can first select the username field with Desktop Recording. Select Record and Desktop from the toolbar In the Desktop Recording bar, select Text Click and select the sign in window.
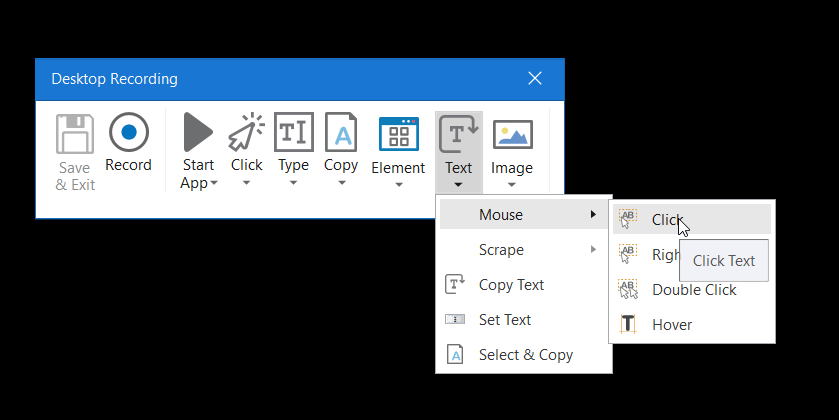
The screen Scraper Wizard will show all the text; you can put “username” in the search text field. Click on “Set Mouse Position” and “indicate a point on the screen”. You can now click on a point inside the User TextBox.
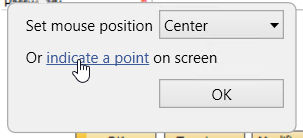
You can choose “Test Click” in screen Scraper Wizard to check if the TextBox is correctly selected. Click Finish to save the steps into the UiPath Sequence. To write the username just use a Send Hotkey Activity inside the just created Attach Window, and put a username variable.


Next, perform the same steps, but this time select the “Password” text, to write the Password in the correspondent field. Alternatively, you can use Send Hotkey Activities and send a “TAB” special Key, followed by the Password. This can be done since in this window the fields are always the same. Finally, use yet another Text Click Activity, and use the text “OK” to confirm the logon. This time it’s not necessary to indicate the position, just leave it to “Center”.
The final sequence will look like this:
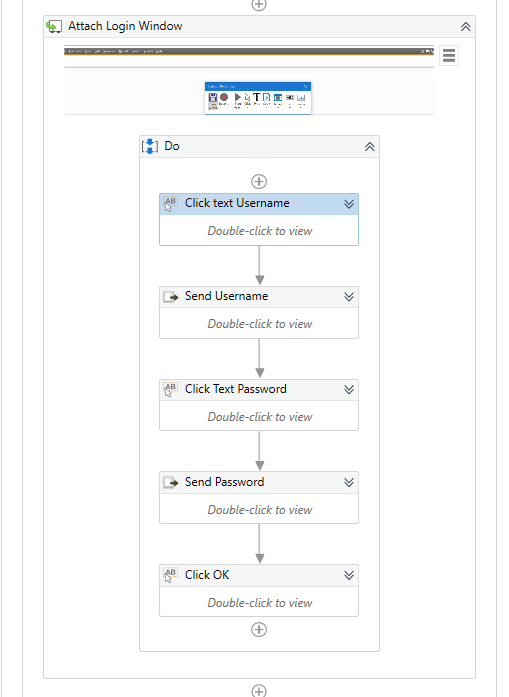
login-sequence2. Select invoice module
To open the Invoice module, we use the “Search” field in the main window, without having to click through the different tabs. We can use a click Activity as done before and click on the TextField on the left of Search.

Now we can use a Send Key Activity to send Ctrl+F3, which opens the search into all menu functionalities.
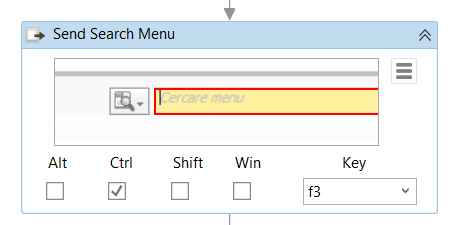
If we spy after the Click text Activity the text field can be selected, so we can use a simple Type Into Activity to write the search term, and a Send Key with Enter to proceed with open the correct window (if we use the full term, only one menu Item will be available and it'll be automatically opened).

3. Create invoice
Now that we have the Invoice window open, we can use the previous methods to populate the interested fields.
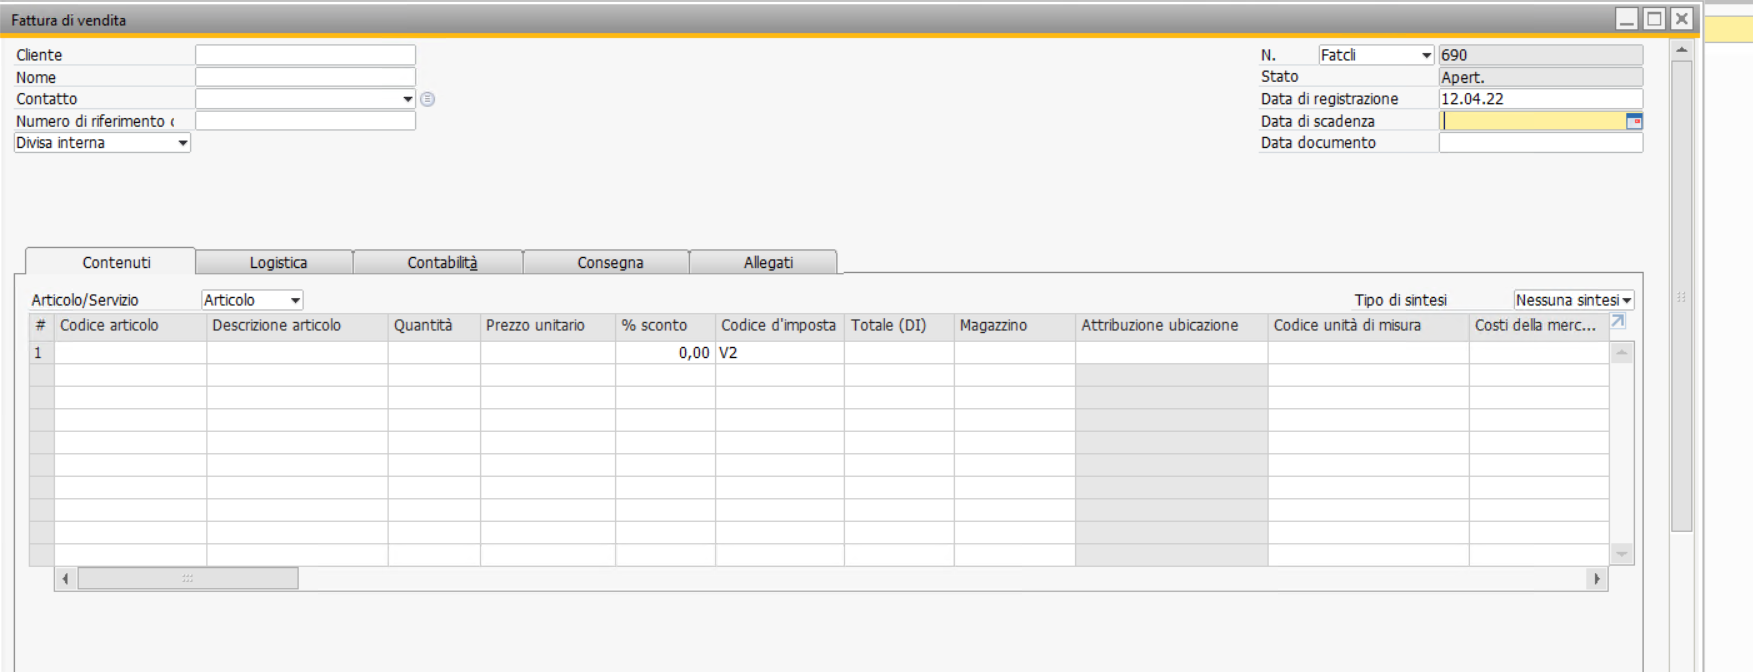
Starting with Client, we can use Click text on the right of “Client” and use one Send Key to populate the Text field with the Client Name and another Send Key with TAB to submit the value to SAP.

The same thing can be done with Registration Date and Document Date, keeping in mind that dates have to follow the format specified by SAP. Next we are going to populate the article table.

We can use a Click Activity below “Article Code” to position the cursor on the first row, and move between all fields using TAB Send Keys, to go on next column, and Down Send Keys, to move on the next Row. The full sequence can be found below.
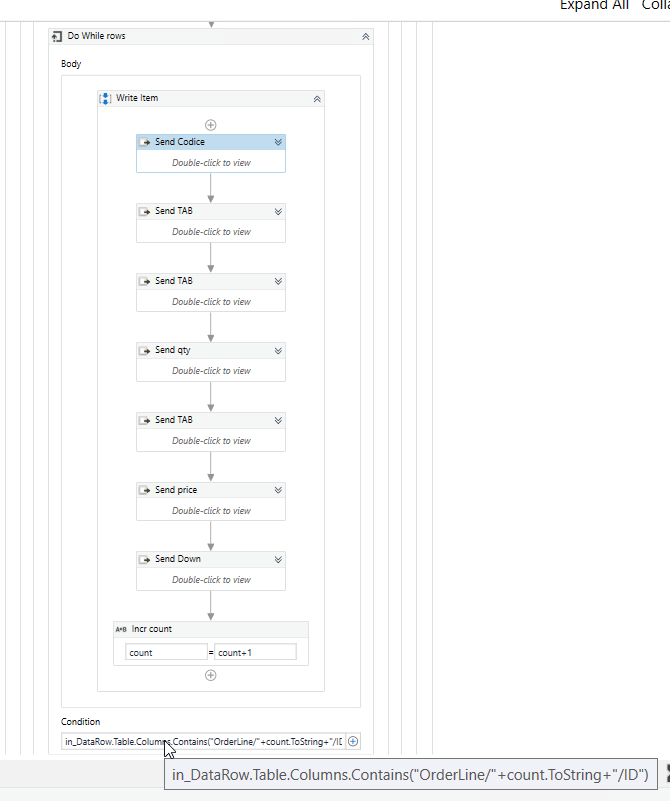
This is just an example based on some fields, not the whole data, but it’s enough to create a valid invoice.
Finally, we can just use a Send Hotkey with Enter to finalize the Invoice, and a Click Text Activity on “Yes” if any popup will be shown (this depends on SAP settings). We can also check for popup messages containing errors, and in that case report the error in the Log Activity or directly to the user.
Conclusion
SAP Business One automations can be a little tricky to begin with, since at the moment there’s not a connector like SAP GUI. Once you have practiced some automations, starting from an easy one and moving step by step on to more complex, you’ll realize that it can be as easy and robust as any other Windows-based automation. Using tools provided by UiPath the development can be fast and reliable, building stable and reusable components for any Business One automation.
RPA Tech Lead, BSP Consultant
Get articles from automation experts in your inbox
SubscribeGet articles from automation experts in your inbox
Sign up today and we'll email you the newest articles every week.
Thank you for subscribing!
Thank you for subscribing! Each week, we'll send the best automation blog posts straight to your inbox.


