UiPath Connector Builder: a comprehensive guide

Summarize:
Introduction
In this blog/tutorial, you will learn how to build your own custom connectors and activities for:
DALL-E Image Generation with API Key as Personal Access Token
SAP S4 ODataV2 with API Key Authentication
USPS API Address Validation with OAuth2.0 Client Credentials
Let’s face it, as much as how fun it is to watch bots prancing around from screen to screen, production-grade efficiency and scale for your automations can be achieved through API connectors.
This is where UiPath Integration Service shines.
Connection management
UiPath Integration Service makes it so much easier to manage API connections in a centralized and streamlined manner. Whether your workflow needs to connect to your O365 ecosystem, Salesforce, ServiceNow, Azure Cognitive Service, Google Workspaces, Amazon Webservices, and 50+ more connections, plus more than 500+ unique activities – Integration Service is the right solution for you. You no longer need to repeatedly publish, test, and deploy your automation package, just to simply change the account you are using, say, for your Outlook application via 365 in Exchange. Now, it’s just one touch (process connection configuration – shared connections) and go!
Cutting-edge GenAI integrations
Consequently, API connections via Integration Service are helping pave the way to increasingly intelligent and efficient automations. Generative AI capabilities are becoming more and more mainstream, hence, there’s a growing mandate to incorporate this kind of intelligence into any automation use case. The latest UiPath GenAI Connectors are here to make every developer’s life easier when building AI powered automations.
However, at some point, you may face the dilemma of being excited about using API for a specific resource, to find out that it is not available as a connector.
What is Connector Builder?
UiPath Connector Builder is a powerful tool within the UiPath Integration Service that allows developers to create custom connectors for various APIs, that aren’t available in the curated list. These connectors can be used to integrate external services and data into UiPath workflows, enhancing automation capabilities by connecting to a wide range of applications and services.
Connector Builder provides a user-friendly interface to define the connection settings, authentication methods, and specific actions or queries that can be performed through the API. It supports different types of authentications such as API Key, OAuth, and client credentials, making it versatile for various API security requirements.
Starting from a blank canvas
Building your own connector from scratch, may seem daunting at first, but it’s easier than you think with UiPath Connector Builder. So, where do you start?
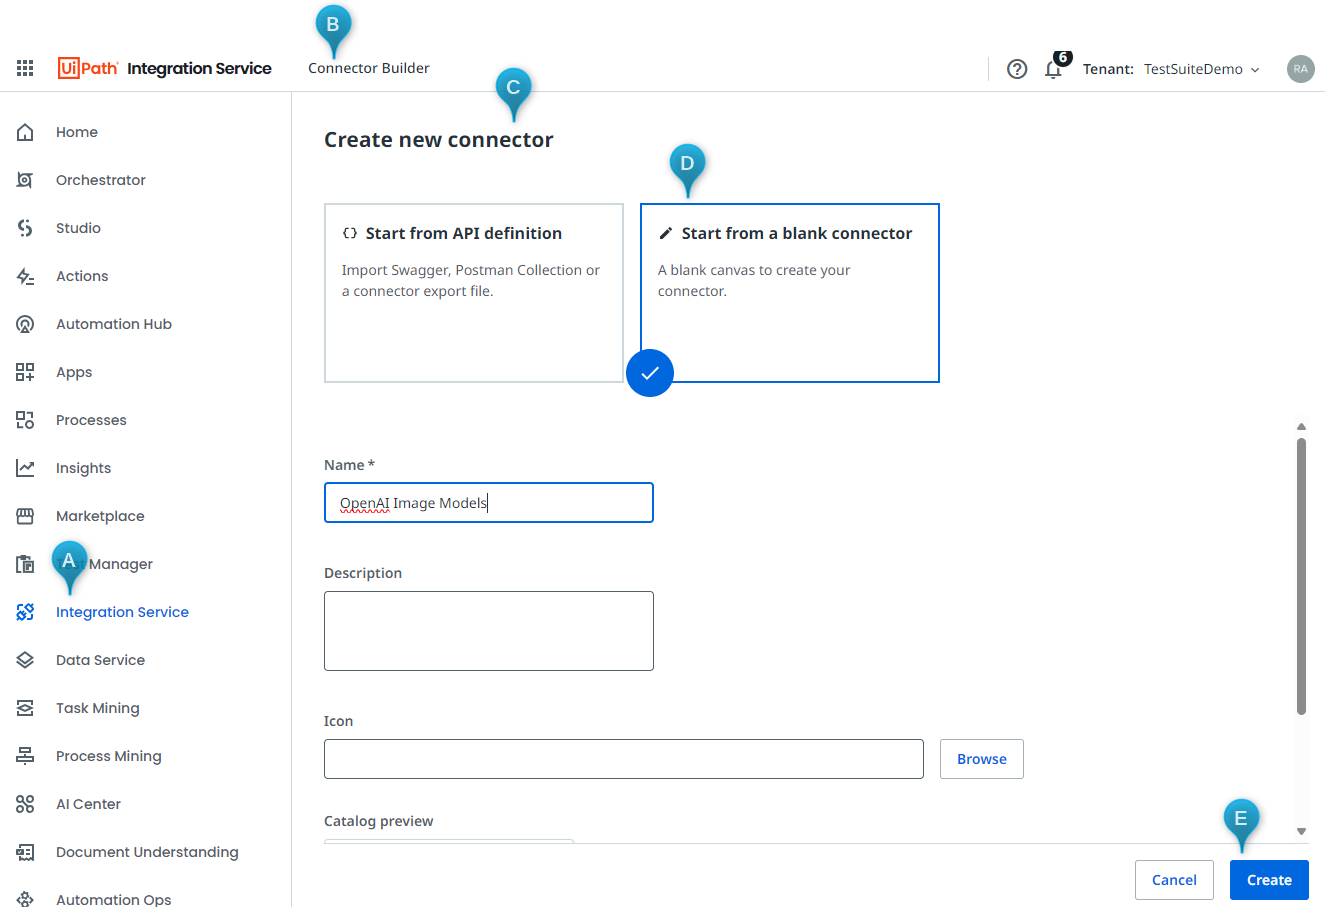
Step 1: Navigate to Integration Service > Connector Builder > Create New Connector > Name your connector > Create
Step 2: Setting up Authentication Mechanism and Resources
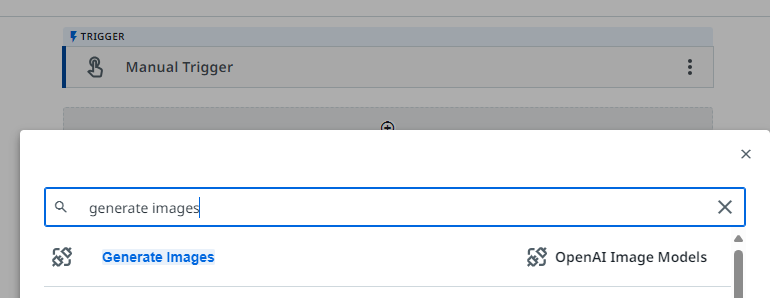
Let’s start with a basic example—using an OpenAI model DALL-E to generate an image based on a text prompt.
You supply a prompt, the model automatically re-writes it for safety reasons, and adds more detail (detailed prompts generally result in higher quality images) – then voila, it outputs the generated image, which can either by a link ("responseformat": "URL") or a base64 string ("responseformat": "b64_json"). Default is an URL. More details on the API parameters here. API Reference - OpenAI API.
Below is an example cURL to generate an image using this API
cURL https://api.openai.com/v1/images/generations \
-H "Content-Type: application/json" \
-H "Authorization: Bearer $OPENAIAPIKEY" \
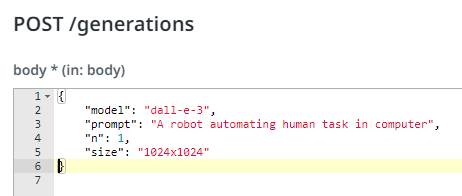
-d '{
"model": "dall-e-3,""prompt": "A robot automating human task in computer,""n": 1,
"size": "1024x1024"
}' There are three key things you need to be aware of in building the first API resource for your connector
(1) Base URL
(2) Authentication Type and
3) API Operation & Resource—sometimes called routes
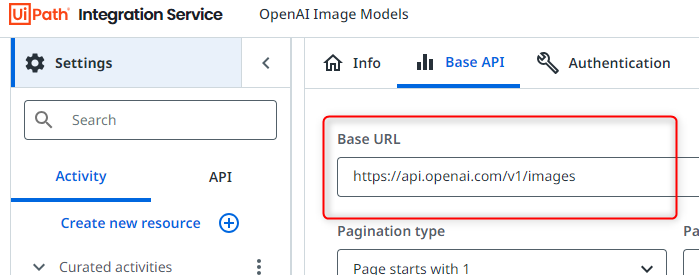
Dissecting the cURL above, we can come up with the following components:
Base URL -> https://api.openai.com/images
Authentication Type -> Authorization: Bearer $OPENAIAPIKEY
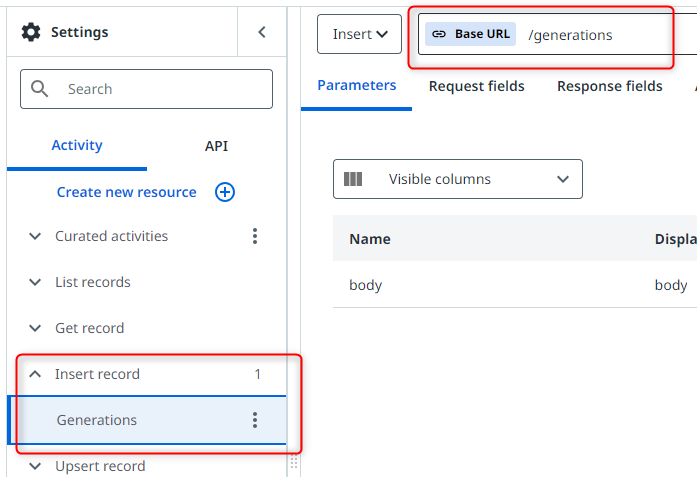
API Operation & Resource -> post /generations
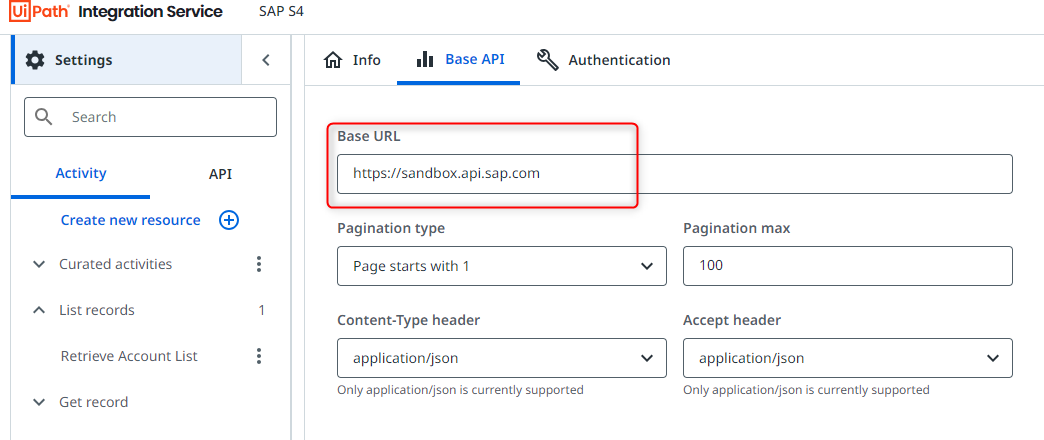
Base URL provides the location or endpoint of the API resource for which the calls are to be made.
Authentication Type tells the connector how the user or client will be authenticated before being permitted to utilize the API resource. In this case, we are using Personal Access Token as a Bearer Token in the Authorization header, using our OpenAI API key. Brief description of each of the most common authentication types is covered in the latter section of this article.

API routes provide the path to a specific resource available on the API e.g. /generations, appended to the base URL, in which that resource can be fetched/listed (GET), added to/inserted (POST — usually comes with a payload data or body, — d or — f attribute in cURL), updated/upserted (PATCH/PUT) or deleted (DELETE).
You can add as much API resources and operations as you’d like, based on the activities that you need for your workflow.
But let’s say, aside from generating images (POST /generations) you also would like to list out all the generated images, so in a hypothetical scenario that this operation is available for the resource, you can add it as a new method, e.g. GET /generations.
Or, if you’d like to build a connector for another capability of this model, which is to edit an existing image, then you would create the POST /edits operations. (Disclaimer: Connector Builder currently supports application/json as payload Content Type and not form data, so this Image Edit functionality of DALL-E model might not be feasible using Connector Builder, currently).
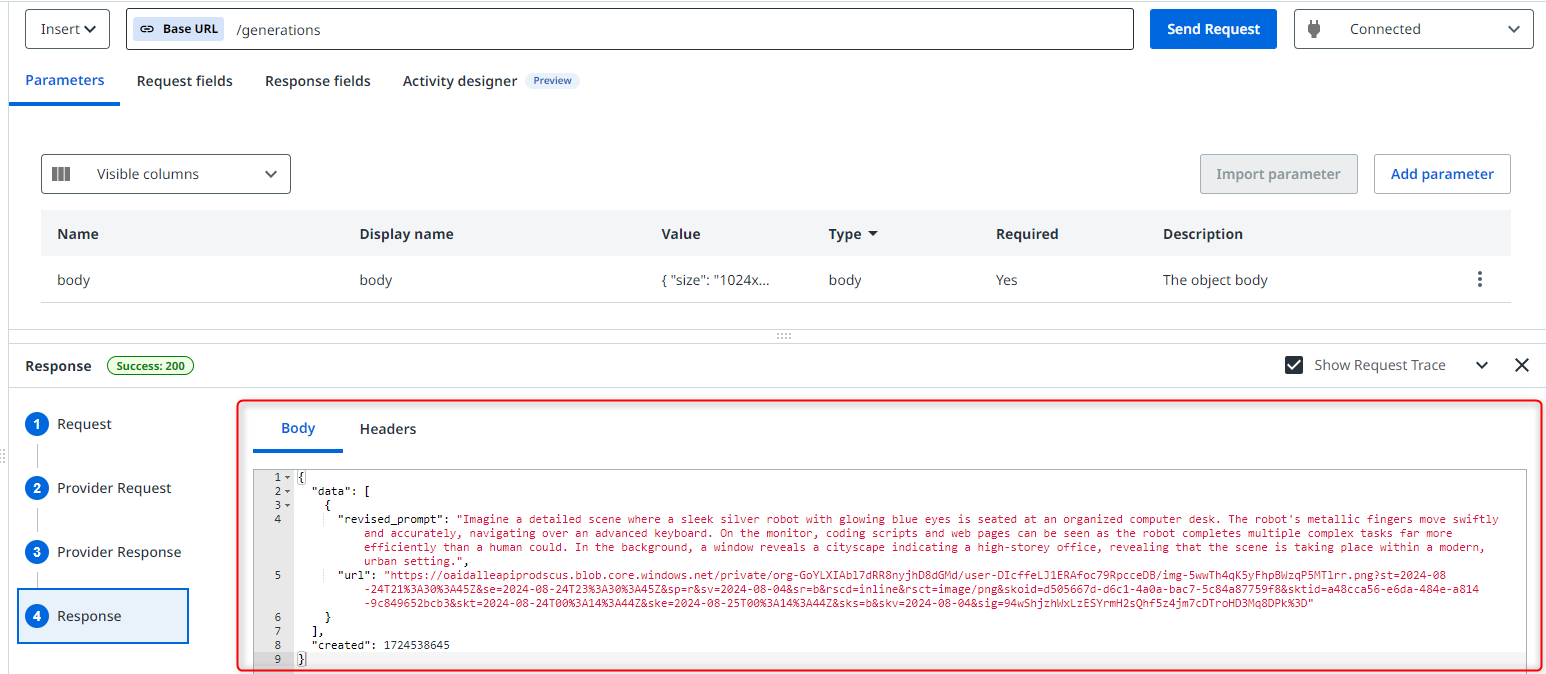
Step 3: testing the API resource output.
You’re almost there! Before publishing and using your connector in your workflow, you have to test it first, of course!
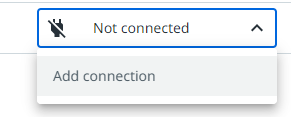
Make sure your connector is in Connected status, by clicking Add connection on the top-right and going through the authentication mechanism you’ve setup.

Then navigate to your first API resource, then hit ‘Send Request’ button. Provide the body or payload for the API, same as indicated in the cURL script provided in this article, as below.
{
"model": "dall-e-3",
"prompt": "A robot automating human task in computer",
"n": 1,
"size": "1024x1024"
}

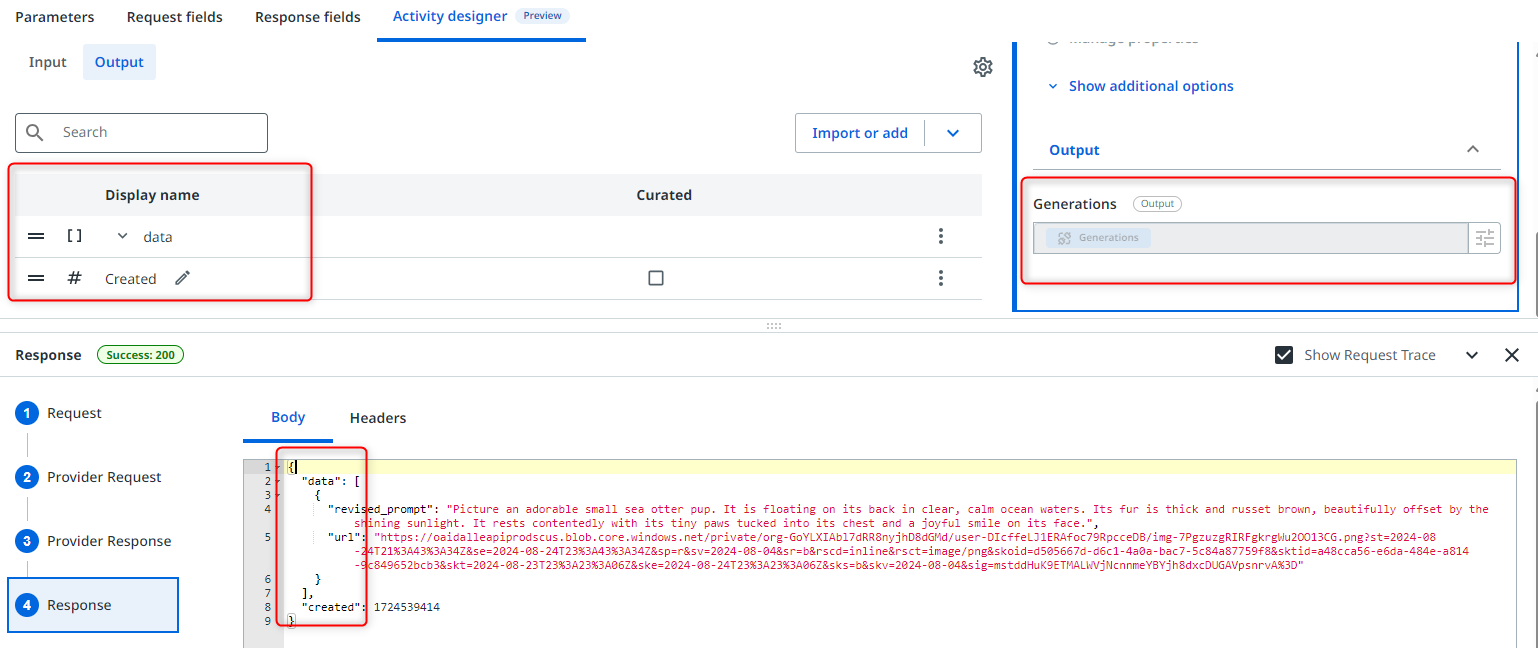
Step 4: Curating Activity Designer and Publishing
Now that you are able to test your connector, you can go ahead and prepare/polish the design of the workflow component for this specific activity – through the Activity Designer.
Activity Designer helps curate input and output fields that you would like to expose to your users for this activity. This will be the ‘look and feel’ when the API connector is used in UiPath Studio or Studio Web.
You can change the Display Name, mark input fields as Required or if it is a Primary or Secondary parameter/attribute (the input fields are auto-generated from the request fields or body once you do a Send Request).

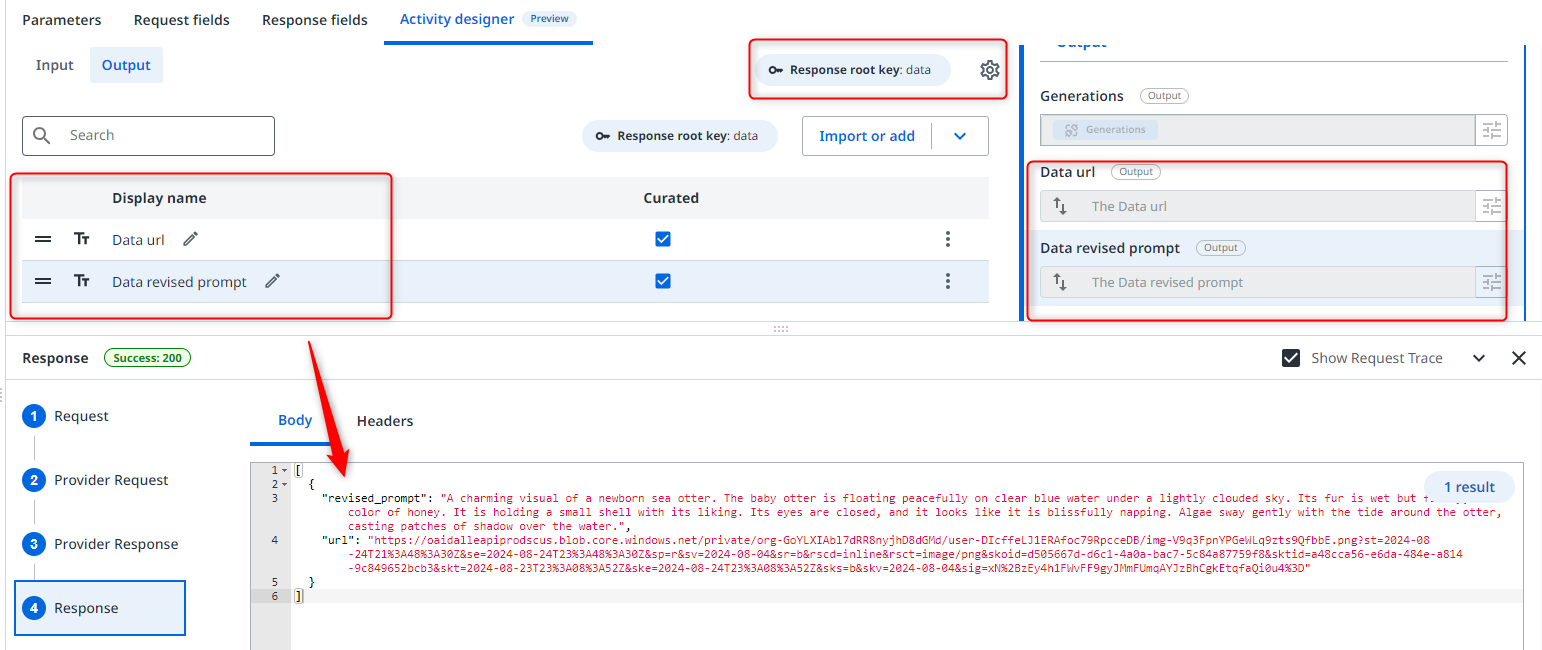
As for the response or output fields, you can update the response root key so you can curate specific output attributes from the API response, like revised_prompt or URL for below.
FROM: no response root key.
TO: response root key = data
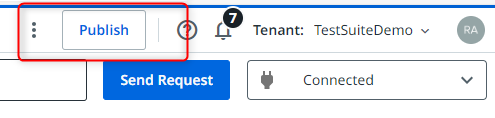
And now, you’re all set! Go ahead and publish your connector in your chosen Tenant, so you can use it in your UiPath Studio and Studio Web workflow!
Try creating a Studio Web project, search for your published connector, authenticate, provide input parameters, and test your workflow!

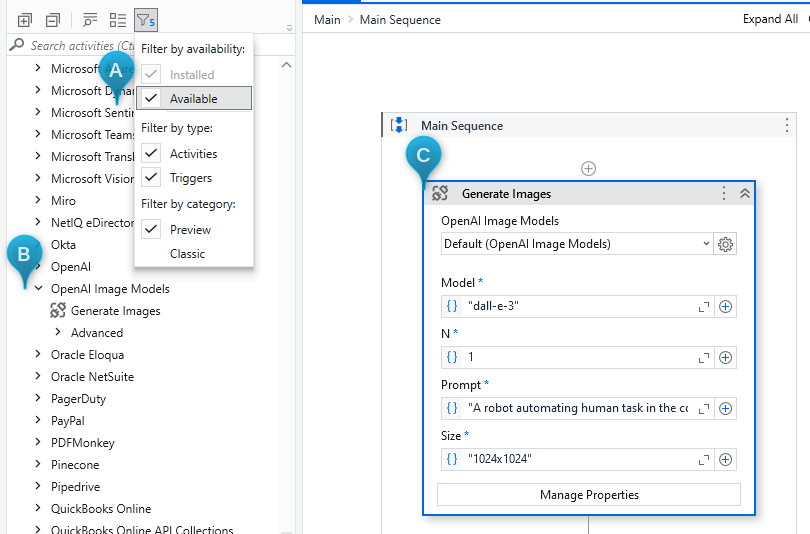
Alternatively, you can also use the activity in UiPath Studio Desktop:
First, make sure Studio is connected to the same tenant where the connector was published.
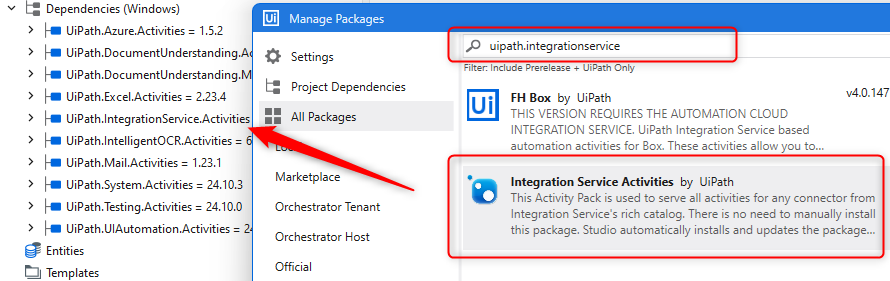
Add UiPath.IntegrationService.Activities Package
Then in the Activities Panel, make sure ‘Available’ filter is checked. On the ‘Available’ section, you can find the curated activities from your connector!
What are the most common authentication mechanisms?
Now, as promised, let’s cover some of the most common authentication mechanisms that are available in UiPath Connector Builder. Below are the three and their comparison in terms of use-case, authentication flow, and security.
OAuth2 Authorization Code Flow
Ideal for applications that need to access user data for the user.
Flow:
User authorization: the user is redirected to the authorization server to grant access.
Authorization code: if the user grants access, an authorization code is returned to the client.
Token exchange: The client exchanges the authorization code for an access token at the token endpoint.
High security as the access token is never exposed to the user agent and is exchanged server-to-server.
OAuth2 Client Credentials Flow
Suitable for server-to-server interactions where no user interaction is involved.
Flow:
Direct token request: The client directly requests an access token from the authorization server using its client credentials.
Access token: The authorization server returns an access token.
Moderate security as it relies on the client's credentials being kept secure.
API key
Simple and quick to implement, often used for public APIs.
Flow:
API Key Usage: The client includes an API key in each request to authenticate.
Low security as API keys can be easily shared or exposed.
How come in the previous example we used OpenAI API Key as Personal Access Token? Do you have an example where we use API key as Authentication Type?
The Generate Image API you just built in the previous example follows the standard practice of using the Authorization header with the Bearer scheme for the API key, especially for OAuth 2.0 tokens.
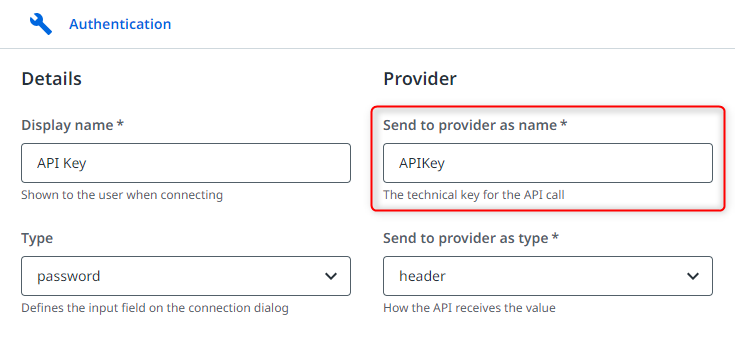
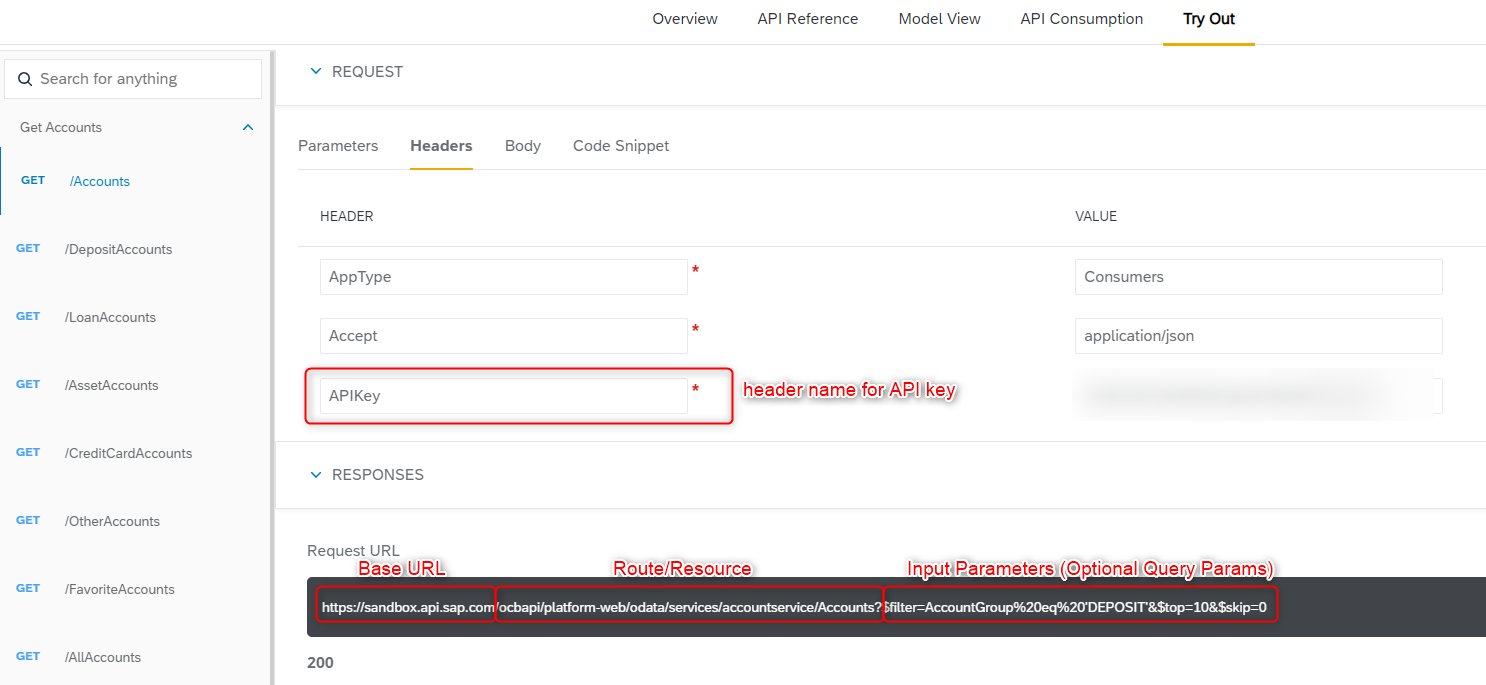
However, there are also APIs like SAP S4 ODataV2 resources that use a custom header like APIKey to authenticate the application.
In this scenario, instead of selecting Personal Access Token as Authentication Type, you would select API Key.
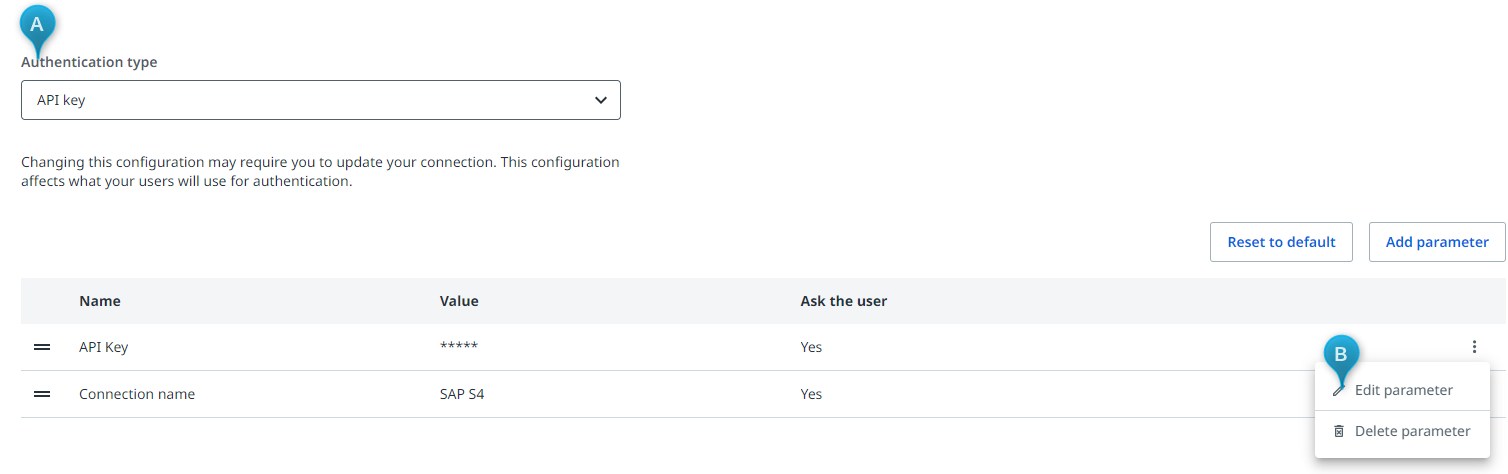
Then, you need to edit the name of the API Key parameter in the connector builder, based on the custom header name for API key in SAP’s API Documentation (Sample API Resource Reference: SAP Business Accelerator Hub).
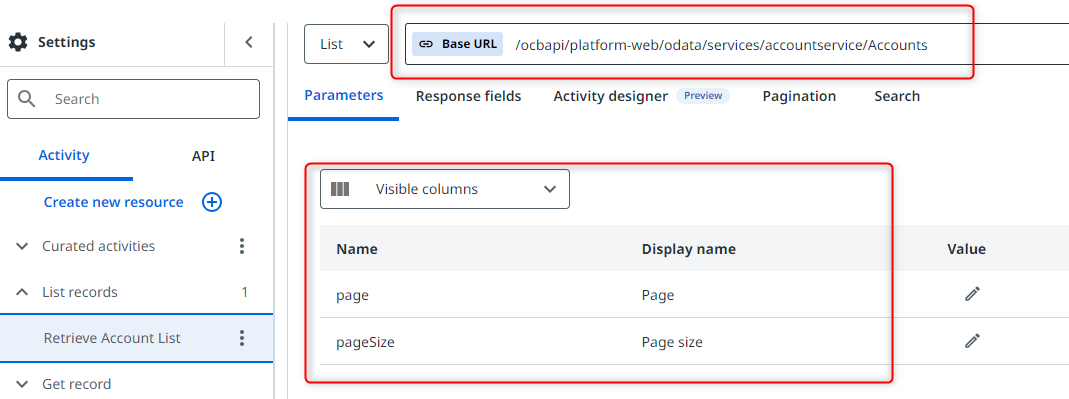
Below is a snapshot of the API reference in SAP API portal.
Below is a snapshot of the connector builder configurations, relevant to building this connector.
The next topic is around another approach to building connections in UiPath Connector Builder—using existing API documentation to, by referring to their URL or as an export file that you can import into Connector Builder initial configuration.
Importing from an API documentation via file or URL
This approach makes it even 10x easier to create your connector by importing tens, and sometimes hundreds of activities/resources included in the API reference. UiPath Connector Builder provides the facility to upload existing API documentation in json or yaml format or even through swagger or postman.
Combining all the knowledge we had for the previous examples, for this use case, we are creating a connector for the USPS Address Validation/Normalization API. But this time, there are two things we will do differently:
Downloading API reference from USPS website
Authentication using OAuth 2.0 Client Credentials
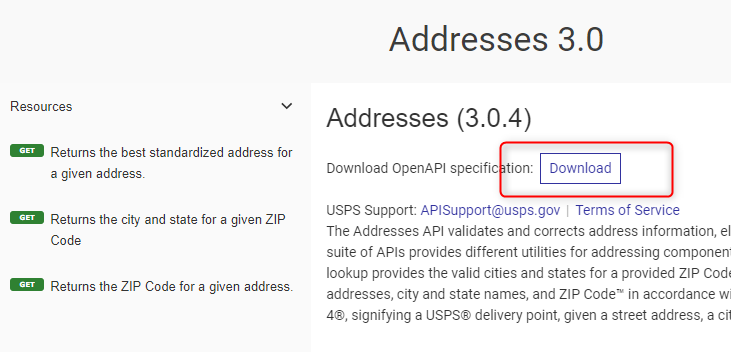
Step 1: Sign up on USPS Developer Portal (Home | devportal (usps.com)) and navigate to the API Catalog.
Download the API reference you want to build the connector for. For example: addresses 3.0 | devportal (usps.com)
Click download
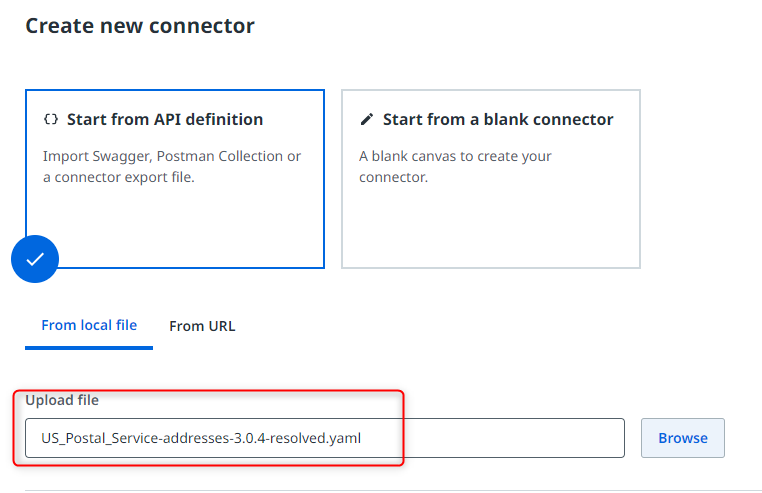
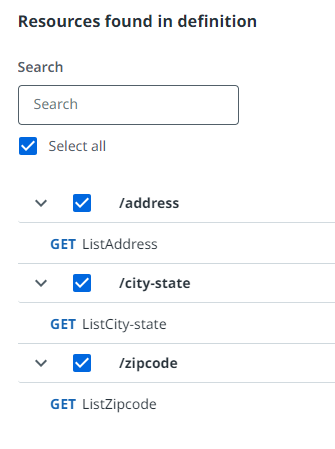
Step 2: Import/Upload the downloaded API reference into UiPath Connector Builder
Step 3: Configure the authentication mechanism
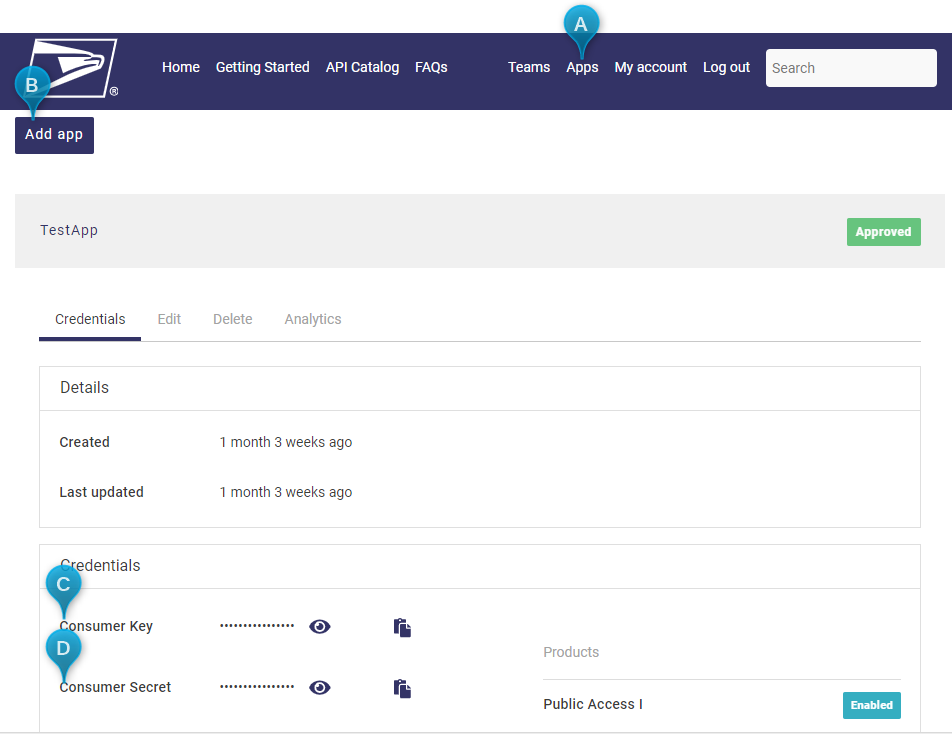
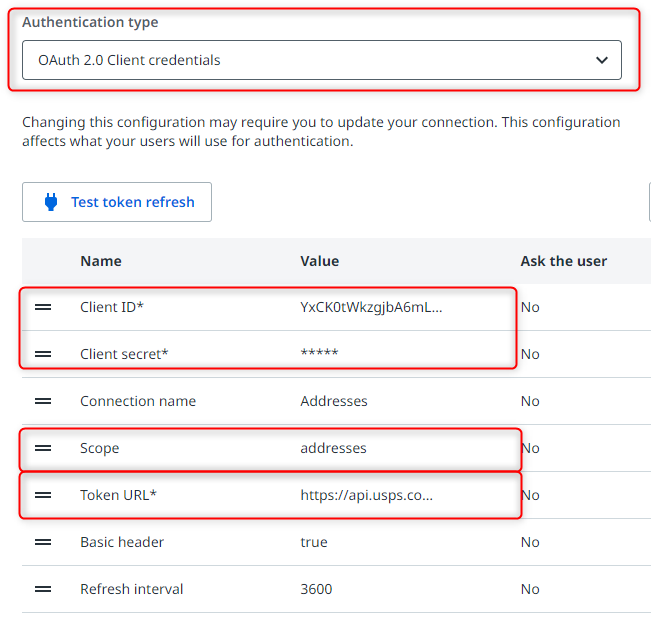
For this part, we need to create a client app in USPS Dev portal so we can provide the client credentials into our Connector Builder authentication. In USPS Dev Portal, navigate to Apps > Add App, then create your app. Once the app is created, copy the Consumer Key (Client ID) and Consumer Secret (Client Secret) from the app. In Connector Builder Authentication tab, choose OAuth 2.0 Client credentials as Authentication Type and input below parameters:
Client ID: <your Consumer Key>
Client Secret: <your Consumer Secret>
Scope: addresses
Token URL: https://api.usps.com/oauth2/v3/token
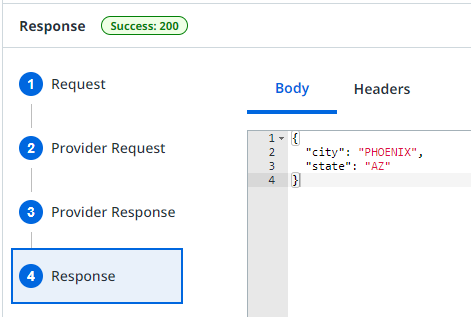
Step 4: Test your connector! Do a quick test of the pre-created API resources by clicking Send Request and providing the input parameters, as below.

And, that’s it! If you are able to follow up to this point, then you can own the art of API connector building using UiPath Connector Builder! Congratulations!
Now, let's recap.
Key features
1. Easy integration: simplifies the integration of external APIs by providing a visual interface to configure the connection and define the operations.
2. Authentication handling: supports multiple authentication mechanisms, allowing secure connections to different APIs.
3. Custom activities: Enables the creation of custom activities based on API operations, which can be used directly in UiPath Studio and UiPath StudioX. 4. Parameter handling: allows defining input and output parameters for API calls, making data manipulation more straightforward.
5. Error handling: includes options to define error handling mechanisms to manage exceptions that might occur during API interactions.
To use Connector Builder, you need to access the UiPath Integration Service and select the Connector Builder option. From there, you can:
Create a new connector: Start by specifying the API endpoint and authentication details.
Configure authentication: Choose the authentication method required by the API and provide the necessary credentials.
Define operations: Set up the API operations you want to automate, such as GET, POST, PUT, or DELETE requests.
Set up parameters: Define the necessary input and output parameters for each API operation.
Test and validate: Before deploying, test the connector to ensure it works as expected.
Deploy and use: Once validated, the connector can be deployed and used within UiPath workflows.
Conclusion
For further information and detailed documentation, users are encouraged to visit the UiPath documentation portal and UiPath Community Forum, where additional resources and support are available.
If you enjoyed this tutorial and would like to see more, do follow me on YouTube at RussYouTrust or reach out to me on my LinkedIn: Russel Alfeche.
Topics:
Integration ServiceTechnology Leader, RPA, qBotica
Related articles


Get articles from automation experts in your inbox
Sign up today and we'll email you the newest articles every week.
Thank you for subscribing!
Thank you for subscribing! Each week, we'll send the best automation blog posts straight to your inbox.
Get articles from automation experts in your inbox
Sign up today and we'll email you the newest articles every week.
Thank you for subscribing!
Thank you for subscribing! Each week, we'll send the best automation blog posts straight to your inbox.